Showing posts with label 40 minutes or less. Show all posts

Sunday, March 22, 2015

Banana Walnut Cake - Nostalgic Kitchen

I really like old cookbooks. I don't mean from 2000 or even 1980. My favorites are from around the 1900s and use terms like "teaspoonfulls" instead of just teaspoons. Since a lot of them are now public domain, you can even find them for free online! They are fun because of the recipes, too. I mean, at the time they didn't have the same kinds of refrigeration or access to fresh produce that we do, or pre-processed things like 'boneless skinless chicken breast,' which is certainly a staple in my modern American kitchen.

Another fun kind is from fundraisers and church groups. The other day I was at Goodwill looking for props for a photo booth. I got a great scarf and a foam hand and over-sized martini glasses, and picked up a Cookbook from the San Antonio Orchestra's Women's group, published in 1963. Sometimes even the descriptions are funny, like Crepes Suiza, which they call the French version of enchiladas but then note that the recipe comes from Mexico City. When I googled the name, I got several pages in Spanish, like this recipe.

I decided to put my fascination with these to good use by including them on the blog, with the tag "nostalgic kitchen." This is the first, and if I stay interested, with enough free time, many more will follow! Of course, my soft spot is sweet things. For my first test, I decided to try Banana Walnut Cake, a simple dessert. The directions are very simple, even if not in the order I would expect.
Cream the butter and sugar? Yes, normal. Add baking soda and buttermilk at the same time? Ok.... but then the flour, vanilla, bananas and nuts at once?? And why fold it, instead of just stir in? Doesn't seem like it would mix right, but I did it anyway.

Since this was just a test recipe, and it has more butter than I would usually put in a recipe. I made just a half batch instead of adjusting things like crazy. It says to bake it in 2 pans (what size? I guess that's up to you? Or maybe you should just know??) but I made it as cupcakes and it filled 8 cupcake cups.

They look pretty good! They feel really soft, taking them out of the tin, and are nice and brown on top. Most of them have dimples in the middle, like they are undercooked, but a toothpick came out clean, so I'm calling it good.

Banana Walnut Cake

(Half recipe, with re-interpreted directions.)

1/4 c butter, at room temperature
3/4 cup white sugar
2 Tbs buttermilk
1/2 tsp baking soda
1 egg
3/4 cup flour
1/2 tsp vanilla
1/2 cup mashed banana (about 1 medium banana)
1/2 cup walnuts, in large pieces

  1. Preheat oven to 350º F, grease muffin tin
  2. Cream the butter and sugar
  3. Add buttermilk, blend, and then mix in egg, then mashed banana
  4. Add flour and baking soda, stir to combine
  5. Stir in walnuts
  6. Pour batter into muffin tin to fill each about 2/3 full
  7. Bake at 350º F for 20-25 minutes, or until tops are brown and toothpick in center comes out clean
Nutrition info: Calories - 238;   Fat - 11g;    Carbs - 32g;    Fiber - 1g;    Protein - 3g
(Mr. More Calories loves that I didn't decrease the butter or walnuts, but we're not all triathletes! Hoping for something similar, but a little healthier? Try this banana bread, without the coconut!)

Wednesday, June 12, 2013

Ile Flottante - So delicious and potentially so light

One of the first "fancy" desserts that I was introduced to in France was the Ile Flottante or Floating Island. I had had many pastries before that, but it was when I went out to a restaurant somewhere and someone else was paying so I got a dessert (I was 18, that's how it was.) They are so fun looking, with the mountain of egg white on top of the sea of creme anglaise. How can you resist??

Ten years later and I still enjoy it. The egg whites let me pretend it has some redeeming nutritional value, and the caramel and cream are delicious and rich. I even got one on Friday when I had a lunch so big, all I wanted was salad and a thin soup for dinner. Would you like to see it? Let's go through the whole thing, shall we?

First, Foie Gras with Ris de Veau en Croute. (Foie Gras [goose liver paté] surrounded by veal sweet breads, all in a pastry crust.) On the side is some fig spread that made it awesome and a sneeze of salad.

Then Cod with a super tasty sauce and what I think is a beet chip. It was tasty. So was the fried onion. Like an onion ring without the breading. Oh, and the fish was quite nice, too.

I thought our wine glass line-up was pretty. Red, water, water, rosé.

And the sides, to be shared for the table. Fried slices of potato and a macaroni gratin (i.e. fancy french fries in a different shape and extra super fancy mac n cheese.)

And finally, our desserts. We shared 2 between four people. The star of the post is in the front.


You could also try Barefoot Contessa's version, I trust her with desserts: http://www.foodnetwork.com/recipes/ina-garten/ile-flottante-recipe/index.html

However, if you want to go the easy route (as I fully intend when I get home) then I would buy some tasty caramel topping and some good vanilla ice cream. I'll probably pick a lite one or a coconut-based one. The you'd make just the island, and melt the ice cream to be your "sea." If you are cautious about the egg whites, just buy the pasteurized stuff.

Time for dinner here, bon appetit!!

Saturday, April 24, 2010

Saturday Splurge: Lime Ricotta Muffins

First, a big apology. My only post this whole week. I had a big presentation on Wednesday for my statistics class (ugh) and I have a 20-25 page paper due on Monday at 3:30. Not. fun. But, that's what they pay me to be here for and all, so I'll do it. You just can't make me smile about it. At least not during the last 3 weeks of the semester.

ON TO THE TASTINESS! Well, then. Today I went to an HP quiz (if you have to ask what HP stands for, I'm not telling you) and then came back and had a huge allergy attack, probably from sitting outside for 3 hours at said quiz, and barely advanced on above-mentioned paper. Then I figured out what to make for dinner and realized I hadn't done my Saturday labor: making treats. Having spotted Ricotta in the fridge the other day, I already had one in mind.

I made these before, about six months ago, actually, and the original recipe is from Rosa's Yummy Yums. I've posted it below with my changes. We don't have real lemons (or limes), which means I went with juice. Lime juice, instead of the original lemon. Still SUPER good. And they didn't take too long. Probably stuck to my one hour that I'm supposed to do for once. These should be even faster for a smaller batch. Quadrupling recipes really does make a difference. That much more flour to measure. And sugar. And baking powder. That much more butter to melt. And then mixing it all together has to be more careful. Then, no cooking spray. So have to grease 48 muffin holes by hand. Don't worry, I'm giving you the single batch recipe :)

I'm fairly certain that these could be made more health-fully without sacrificing much (if any!) of the flavor and texture, but the house gets whole milk ricotta so I'd need to go buy the other stuff to find out. A summer project, I suppose. I hope that didn't scare you, they're really not bad as-is (203 calories), which is why I think it'd be no problem to make them even better!

Lime Ricotta Muffins
Serves: 12 Time: about 30-40 minutes

2 cups all-purpose flour
1/2 cup sugar (+2 Tablespoons if you want to make them pretty)
2 1/2 teaspoons baking powder
1/2 teaspoon salt
1 cup ricotta cheese
1/4 cup milk
6 tablespoons unsalted butter
2 eggs
1/4 cup lime juice

1. Preheat oven to 200°C (400°F).
2. Grease twelve 2 ½” by 1 ¼” muffin-pan cups or line with paper baking liners.
3. In large bowl, stir together flour, ½ cup sugar, baking powder and salt.
4. In medium bowl, with wire whisk or fork, mix together ricotta, milk, melted butter, eggs and lime juice.
5. Make well in center of flour mixture and pour in ricotta mixture; stir until just moistened.
6. Spoon batter into prepared muffin-pan cups.
7. Sprinkle remaining 2 tablespoons sugar over muffins.
8. Bake 20 to 22 minutes, until muffins are golden brown, tops spring back when lightly touched or a toothpick inserted in center of muffin comes out clean.
9. Immediately remove from pan; serve warm. Or cool on wire rack to serve later.

Tested variations:
- Whole wheat flour, using flaxseed as egg replacement
- White whole wheat flour, using 1 packet stevia, 1 1/2 Tbs agave and 2 Tbs frozen apple juice concentrate instead of sugar
- Half cottage cheese (I had less ricotta than I thought one day!)

Nutrition info for one muffin: Calories - 203;    Fat - 8.4g;    Carbs - 26.5g;    Protein - 5.7g

Thursday, April 1, 2010

White Chicken Chili

I finally remembered to take a picture when making this! Originally I didn't give much info on this because I was really busy with school - but not so busy that I couldn't post it!

Here are my comments the first time: The short version: one of the girls I cook with had this over spring break and then got the recipe. It's super good. I didn't know what to expect, but I was loving it. In the past I couldn't get white beans (the place we ordered our food from didn't have them) so we used regular kidney beans. Still good!

Since moving into my own place I have made it several times. I love how each time it can be a little different, and the freshness the toppings add. The last several times I've made it with just half a pound of chicken and that has been plenty for us. If you use a non-stick pan, you can also decrease the oil if you don't want the onion and garlic browned or cut it out completely.

You can let it simmer for as long as you like, but the time listed should be fine, that's all ours simmered for the 100ish servings we made. I think the toppings really are nice, too, because then it can be personalized.


White Chicken Chili
Serves: 6 Prep time: 15 minutes Cook time: 25 minutes

1 Tbs olive oil
1 medium onions
2 cloves garlic, minced
3 cups chicken broth
2 Tbs fresh chopped cilantro
2 Tbs lime juice
1 tsp ground cumin
1/2 tsp dried oregano leaves
1/4 tsp red pepper sauce
1/4 tsp salt
1 1/2 cups frozen corn (or one can)
1 (15 oz) can great northern beans, drained (1 1/2 cups)
1 (15 oz) can white kidney beans, drained (1 1/2 cups)
1 1/2 lbs chicken breast
2 Tbs olive oil
Toppings: tortilla chips, green onions, diced tomatoes, fresh cilantro, sour cream, shredded cheese and sliced avocado

Two-pan method:
1. Cut chicken into cubes. Mince garlic. Chop onion.
2. At the same time as #2, heat oil in a large pot over medium heat. Cook onions and garlic in oil, stirring occasionally, until onions are tender.
3. **At the same time**, cook chicken with oil.
4. Add all ingredients into large pot (where the garlic & onion were cooked - you can add the stock if the garlic & oil finish before the chicken.) Heat to boiling, then reduce to medium-low. Simmer uncovered until heated through.

One-pan method:
1. Cut chicken into cubes. Mince garlic. Chop onion.
2. Heat a large pot over medium high. Toss in oil, onions and garlic, stirring for just a moment, and then add chicken.
3. Add all ingredients into large pot (where the garlic & onion were cooked - you can add the stock if the garlic & oil finish before the chicken.) Heat to boiling, then reduce to medium-low. Simmer uncovered until heated through.

Nutrition info (1/6th of recipe, no toppings): Cal - 429   Fat - 9=12.6g   Carbs - 30.9g    Protein - 48.5g

Tuesday, March 9, 2010

Pumpkin Raisin Bites

The recipe I used called these cookies, but nobody who tasted them agrees. The words "fluffs" and "puffs" were suggested, but one person pointed out that fluffs sounds like lint and I think puffs is too much like cream puffs or puff pastry - both things with a lot of air and these certainly leave no room for that. They are light and fluffy, but solid.

Don't tell the house, but I snuck something healthy into their diets for my Saturday treat-making duties. The other day I saw that there was a giant thing of pumpkin. And raisins. And many cans of evaporated milk. And whole wheat flour. I thought about pumpkin pie, but it's so much nicer to be able to grab something as you walk past instead of getting a plate. (And I ended up making crustless pumpkin pie a few days later so the pumpkin wouldn't go bad.) As I started looking for pumpkin raisin cookies, I came across one low-fat vegan recipe on many different sites. It looked good, but I doubted its ability to fly in a rather non-vegan environment. After the addition of fat and animal products, and replacing some of the wheat flour with white since I didn't have pastry flour, I thought I had a great recipe.

I mixed everything up and when it came out, they were super tasty. Not at all cookie-like. And not that sweet. Being a person who doesn't need super sweet, I was ok with that. I think they'd be a great treat just the way they are. I also know my audience, though, so I mixed up some glaze that I used on about 3/4 of them. Perfection! I think that the recipe should be really easy to play with - if you want to omit the butter, just use 1/2 cup skim milk. If you want to use soy milk, like the original, go for it. Prefer splenda? That's ok, too. Like any low-fat recipe, these are best eaten the same day or frozen.

Pumpkin Raisin Bites
Makes: 24 3-inch cookies Time: 35 minutes

1 1/2 cups whole wheat flour
1/2 cup all-purpose flour
1/2 cup sugar
2 teaspoons baking powder
1/2 teaspoon baking soda
1/2 teaspoon salt
1/2 teaspoon cinnamon
1/4 teaspoon nutmeg
1 cup pumpkin
1/4 cup skim milk
1/4 cup butter (unsalted preferred)
1 cup raisins (or use 1/2 and replace other 1/2 with nuts)
Spray oil

- Preheat oven to 350ºF and grease a baking sheet
- Place raisins in a small bowl and cover with HOT water to plump
- Mix dry ingredients (first 8) in a large bowl
- Add remaining ingredients, including raisins, and mix completely
- Drop by tablespoons onto greased baking sheet. They can be close together since the low butter content means they will hardly spread, if at all.
- Bake 15 minutes or until lightly browned
- Remove from sheet and let cool on a rack
- Eat like that, or add the glaze

For the glaze (optional):
2 cups powdered sugar
1/4 cup milk (whole milk gives the thickest glaze, skim the thinnest)

- Mix powdered sugar and milk in a medium bowl
- Dip each bite, upside down, into the glaze. Dip only the top as the glaze will run down the sides on its own. The glaze will harden if you don't eat them all first.
- NOW you can eat it! :)

Nutrition info (1 bite, no glaze): Fat - 2.1g Calories - 94 Carbs - 18g Protein - 1.5g

Tuesday, February 23, 2010

Creamy Tomato Basil Soup (and oven-grilled cheese sandwiches)

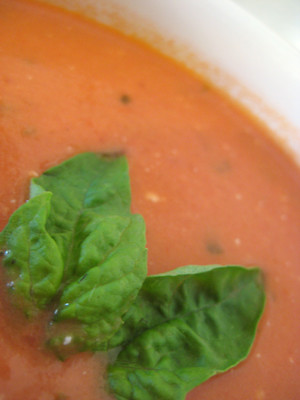
I don't like tomato soup from a can. I do like one brand's roasted red pepper tomato soup, but it's a box. And I always add tobasco to that anyway. I'll eat canned tomato soup now and then, particularly with grilled cheese, but only after adding garlic powder and basil. Makes it much better. Once in Tunisia I tried to make tomato soup because you can't get it there. I based it on my own ideas of how soup my come about, using tomato paste. Disaster; not recommended. However, I knew with a recipe I could do better than the can. Last week for lunch, I decided I'd try it out for my building. Definitely worth it. It was honestly very easy and fun to make (the immersion blender is my new best friend) and everybody seemed to like it. Somebody asked if it was from scratch, and when I said yes it really surprised a few.

I forgot to take a picture (note to self: take camera to making lunch) but I found one that is the same color as mine was. She actually used a recipe from Cooking Light, but I don't think their changes are worth it (unless you have cream cheese instead of heavy cream on hand.) They save 1.8g of fat per serving, but it's not high to start with and if you have cream cheese, you're going to get sodium and other things that you won't have in the plain cream. It's up to you. For the tomatoes, do try to find low-sodium or no-salt-added if you can or else you'll have half your daily sodium intake in one bowl. I'm also adding the directions for grilled cheese in the oven, because when you're making lots, a pan is just too slow.

Creamy Tomato-Basil Soup (apparently like at La Madeleine)
Serves: 8 Cook time: About 40 min

4 cups canned crushed (or diced) tomatoes (or fresh chopped tomatoes) with juice
4 cups tomato juice OR 2 c tomato juice and 2 c vegetable/chicken stock
14 washed fresh basil leaves
1 cup heavy cream
Salt to taste
1/4 teaspoon cracked black pepper

- In a saucepan, heat the tomatoes, tomato juice, and stock (if using) on medium until hot all the way through (fresh tomatoes will need a while here, maybe 20 minutes)
- Blend in the basil leaves (in a blender, processor, or with an immersion blender) so that the tomatoes are all blended up.
- Add the cream and pepper, as well as salt to taste
- Stir 5-10 minutes or until hot enough for you.

(If you want to make this ahead, just leave out the cream until you re-heat it.)

Nutrition Info (1/8 of recipe, using tomato juice): Calories - 123 Fat - 5.6g Protein - 4.3g Carbs - 15.6g


Grilled Cheese, oven style

- Preheat oven to 425
- Put the bread and cheese however you'd like. Throw on ham or turkey or tomato or even a fried egg. The sandwich should be completely assembled (bread, cheese, bread all together) on a baking sheet
- Place in oven for 4 minutes
- Flip sandwich, let cook 3 more minutes or until cheese is thoroughly melted

Yep, that easy! Mine came out nicely golden brown without any butter, but of course you can do butter or spray oil if you like.

Tuesday, February 16, 2010

Chipotle corn chowder

I wanted to make chipotle corn chowder for lunch in my building, but couldn't find the recipe I had before (ha, if I had one! I may have made it up to begin with.) In my search, I found this fantastic one from Kait's Plate. What makes it so fantastic? Sweet potatoes! They are so good and full of nutrients and just a lot more fun than regular potatoes. What's not to like?? It is filling because of the heartiness of the potatoes, a little bit creamy because of the cream and butter, and has a good flavor. I almost always adjust spices in recipes, but all I did here was add a bit of cumin, though it honestly didn't need it. Next time I may use an immersion blender on it for a few seconds, just to give it a little more thick stuff holding it together.

I admit that this was not AT ALL quick when making about 70 servings. Yep, we used 32 pounds of sweet potatoes. Do you realize how long those take to peel? And chop?? To be perfectly honest, I may not have felt so ambitious if I had known. But now that it's done, I am happy. Because it was quite tasty. Spicy enough to deserve the name, but mild enough that nobody got a runny nose or thought it was too hot. A couple of "not soup people" even went back for seconds. And it was extra wonderful because dinner turned out to be so.... sparse. I was one of the last ones in line, so several things were out by the time I got there and I ended up with asparagus and zucchini in tomato juice. Hmmm... Luckily I know how to find other food :)

I made two versions: one veggie, one chicken. For the veggie one, I used vegetable stock to make it truly vegetarian. If I were to make it just for myself, I'd use chicken stock and then just not put in chicken. That's why they call me a 'fake vegetarian' around here. For the chicken one, we had 10 lbs of chicken, so for a single recipe that would be... 2.5 lbs. It was a lot, though, far too much I think, so I'd actually suggest 1.5 lbs, max.

Chipotle corn chowder
Serves: 8 Cook time: 40 minutes (that's quite a guess!)

3 tbsp. butter
3-4 lb
sweet potato, peeled and cut into 1 inch cubes
1 large onion, diced
3 tbsp. all-purpose flour
1 quart chicken stock
½ lb. frozen corn kernels
2 chipotle peppers in adobo sauce, finely chopped
½ cup heavy cream
5 thyme sprigs
Salt and freshly ground pepper
Cilantro

- Heat butter in a large pot over medium heat.
- Add sweet potatoes and onion and cook 5 minutes.
- Add flour and stir into the onion and sweet potato.
- Gradually add chicken stock while stirring.
- Add corn, chipotle peppers, cream, and thyme and bring to a simmer.
- Reduce heat to low and simmer about 10-15 minutes, or until the sweet potatoes are fork-tender but not falling apart.
- Remove from heat and season to taste with salt and pepper.
- Garnish with cilantro (or avocado or tortilla chips, if you like).


Nutrition info (1/8 of veg recipe, no toppings): Fat - 7.9g Cal - 269 Carbs - 46 Protein - 5.5g

Tuesday, January 19, 2010

Pistachio Cherry Teacakes

Hello again! I got busy toward the end of last semester, and then went out of the country, but now that I have told more people about this blog, I have great motivation to update :)

So to start, I am going to cheat a tiny bit in order to get back in the habit - a very good one from CL that you can find here. The picture is theirs, too. They call them 'wedding cookies' but I always learned them as teacakes, so take your pick. I admit that, for me, the dried cherries are a bit of a splurge, so if you can find them in a bulk foods section, that would make it easier. I upped the pistachio, used only regular flour and didn't coat them in powdered sugar, because it always makes me cough when I go to eat them. Maybe I could slow down instead, but that would be boring. Be careful when measuring the flour here, to really spoon it lightly into the cup and then level it because if you have too much the cookies will fall apart.


Pistachio Cherry Teacakes

Makes: about 32 cookies Total time: around 40 minutes, but the last 10 is just waiting for them to cool.

2 cups all-purpose flour
3/4 cup powdered sugar
2 tsps cornstarch
1/4 tsp salt
1/2 cup chilled butter, cut into pieces
1 Tbs ice water
1 1/2 tsp vanilla
1/2 cup dried tart cherries, chopped
1/2 cup finely chopped dry-roasted pistachios

- Preheat oven to 350 F.
- Combine flour, powdered sugar, cornstarch and salt in a food processor; pulse to combine.
- Add butter, a few pieces at a time, to processor. Process about one minute or until mixture looks like coarse sand.
- Combine ice water and vanilla in a small bowl/cup, sprinkle over processor mixture (or add through chute, if you have one). Process one minute, or until well combined - but it will still be very crumbly.
- Add cherries and pistachios, pulse until just combined. Put mixture into a bowl.
- Gently press into a level tablespoon, packing with the heel of your hand. (If you don't pack these, they WILL fall apart.) Turn onto a baking sheet coated with cooking spray. Continue until all dough is used.
- Bake at 350 for 15 minutes or until bottoms are golden. Remove from oven, cool 10 minutes on baking sheet.

Nutrition info for one cookie (if 32 are made): Calories: 82 Fat: 3.9g Carbs: 9.5g Protein: 1.2g

Tuesday, September 22, 2009

Food bars

You could call these energy bars or protein-ish bars, but I like the term "food bars" best. It's good, easy, healthy food in bar form. How much better than that can you get? The original recipe is from foodnetwork but, as usual, you will find my own changes below. My main complaint with theirs is that they asked for EVERYTHING to be blended up in a processor. I don't really like the bars that are all one consistency, so I kept some of my stuff bigger. If you want to make it quicker, don't process anything, or process everything. I also replaced the wheat germ with garbanzo flour. Seemed like a cool idea. If you make only 10 bars, they are a pretty good size, though the original recipe suggests 20 (size pictured.)

Update: I have since tried them with wheat germ, and it worked really well, too. It changes the flavor, and I'm not sure yet which I prefer. Wheat germ is certainly easier to find, though. :)


Food Bars
Serves: 10 Total time: 30-40 min, depending on whether you chop stuff

1 cup rolled oats
1/2 cup sunflower seeds (raw or roasted, but unsalted are better for you)
1/2 cup almonds
1/2 cup craisins (or raisins would work)
1/2 cup garbanzo flour
1/4 cup whole wheat flour
1/2 cup nonfat dry milk
1/2 tsp cinnamon
1/4 tsp ground ginger
1 cup pitted dried dates
1/3 cup maple syrup (or honey - I used lower-sugar syrup that doesn't have fake sugar)
2 large eggs
1/4 cup chocolate chips (optional)

- Preheat the oven to 350.
- In a small bowl, mix oats, sunflower seeds, almonds and craisins. Pour half of mixture into food processor
- Add to food processor both flours, spices and milk, spice til there are no big chunks left
- In large bowl, mix eggs and syrup, stir in mixture from processor
- Process dates (alone) until all in small bits, add to large bowl
- Process the conserved oat mix 4-5 times, leaving some large chunks (whole almonds are ok)
- Mix everything except chocolate chips in the large bowl until basically combined
- Press into a greased pan (13x9, 9x9, whatever you have) and bake at 350 for 20 minutes
- Once cooked, remove from oven and sprinkle chocolate chips on top. Let set to melt a few minutes, then spread.

Nutrition info (1/10th with chocolate chips): Calories - 277 Fat - 7.1g Carbs - 47.2 g Protein - 9g
Nutrition info (1/10th, NO chocolate chips): Calories - 254 Fat - 5.9g Carbs - 44.7 g Protein - 8.7g

Sunday, July 26, 2009

Grilled pizza on a whole wheat crust

The way that we did this, it was really quick. We had some friends over and grilled a lot of food. After everything else was done, but while the coals were still hot, we threw on two chicken breasts that we had no intention of eating that day. If somebody had decided they were still hungry, they could have eaten them, but everyone was stuffed before the chicken was cooked. So, now we have grilled chicken and left-over grilled veggies. Stir up some quick pizza crust and - voila! - tasty, healthy pizza. The crust recipe is originally from here, I didn't change it at all. It's that good. Add spices if you like.

You can let it rise, or use it immediately; I've done it both ways, and it's always good. If you want to make it go even faster, put the crust into a pan, cook it for about 5 minutes while you finish getting the toppings ready, top with veggies/meat, cook 5-10 minutes, top with cheese, cook about 5 minutes until cheese is melted.

Whole Wheat pizza crust
Serves: 8 Prep & cook time: 20-25 min. (just the crust)

2 cups whole wheat flour
1 package active dry yeast/instant yeast
3/4 teaspoon salt
1 cup hot tap water (120 - 125°F)
1 tablespoon vegetable oil
1 tablespoon honey or granulated sugar

- Preheat oven to 425°F
- To prepare pizza dough, stir whole wheat flour; lightly spoon into a measuring cup and level flour.
- In large mixing bowl, combine whole wheat flour, yeast and salt. Blend in water, oil and honey or sugar. Stir by hand vigorously until all ingredients are well mixed; about 3 minutes. Cover with plastic wrap and let rise to desired size.
- Place dough in greased 15 x 10 x 1-inch jelly-roll pan or 12 to 14-inch pizza pan. Press dough to cover bottom of pan and up sides to form a rim.
- Add pizza sauce of your choice and your favorite pizza toppings; bake in oven 15 to 20 minutes or until crust is golden brown and toppings are done.

Nutrition: One slice of crust only provides approximately: 146 calories, 5 g protein, 27 g carbohydrates, 4 g fiber, 2 g fat (0 g saturated), 0 mg cholesterol, 37 mcg folate, 2 mg iron and 219 mg sodium.

Monday, June 29, 2009

Smoky Broccoli Casserole

This is one of the recipes that I used my left-over chipotle chiles in. It was definitely a good call. The original title from CookingLight was "Zesty Broccoli Casserole", but I don't know where they think they found "zesty" in their version unless their cheese was SUPER sharp. They used frozen broccoli, but I used fresh. It was still a bit crisp, but I don't like mushy food. We decided that this would be really good as a main dish with (1 1/2 lbs) chicken added in. We used the chipotle pepper in adobo left over from the sloppy joes, and it added a nice flavor.


Smoky Broccoli Casserole
Serves: 4-6 Time: 40 min

Ingredients

2 medium heads broccoli, cut into bite-sized pieces
Cooking spray
1 1/2 cups fat-free milk
2 1/2 tablespoons all-purpose flour
1/2 teaspoon salt
1/4 teaspoon freshly ground black pepper
3/4 cup (3 ounces) shredded pepperjack cheese
1/2 cup (4 ounces) fat-free cream cheese, softened (or neufchatel)
3/4 cup chopped onion (about 1/2 medium)
1 (8-ounce) can water chestnuts, rinsed, drained, and sliced
2 chipotle peppers in adobo sauce, chopped
3/4 cup breadcrumbs

Preparation

- Preheat oven to 375°.

- Chop broccoli and arrange in an even layer in an 11x7 or 8x8-inch baking dish coated with cooking spray; set aside.

- Combine milk, flour, salt, and pepper in a large saucepan over medium-high heat; bring to a boil. Cook 1 minute or until thick, stirring constantly. Remove from heat. Add cheddar and cream cheese; stir until smooth. Stir in onion, chipotle pepper and water chestnuts. Spoon cheese mixture evenly over broccoli.

- Sprinkle breadcrumbs evenly over cheese mixture. Lightly spray breadcrumb layer with cooking spray. Bake at 375° for 25 minutes or until mixture begins to bubble and breadcrumbs brown.

Friday, May 29, 2009

Aragorn Cookies

Dan named these - they are improved Ranger Cookies. "Improved" because I used part whole wheat flour and cut out some sugar and half the butter. I really like this kind of cookie because you can put pretty much anything in it. Just be careful because if you add too many things, there won't be enough dough to keep it all together. Because of the corn flakes, I would recommend making a smaller batch (like I have here) unless you will be sharing with a lot of people. They're just not as nice if they lose all of their crunch. Also, if you have two cookie sheets or one big one, I think it's worth baking them all at once so that the cereal stays crisp.


Aragorn Cookies
Makes about 2 dozen cookies

1/4 cup (1/2 stick) of butter, softened
1/4 cup plain nonfat yogurt
3/4 cup firmly packed brown sugar
1 egg
1 tsp vanilla extract
1/2 cup all-purpose flour
1/2 cup whole wheat flour
1 tsp baking soda
1/4 tsp baking powder
1/4 tsp salt
2 cups old fashioned oats
2 cups corn flakes
1/3 cup sweetened shredded coconut (toast it, if you have the time)*
1/3 cup craisins (or raisins)
1/4 cup butterscotch chips (if using raisins, consider chocolate chips) (and yes, that's enough for a healthier version to still get them in all the cookies)

-Preheat oven to 350.
-In a large bowl, beat butter and sugar until it lightens in color, about 2-3 minutes. Add egg, yogurt and vanilla; blend well.
- Stir in oats flours, baking soda, baking powder, and salt. Add corn flakes, coconut, craisins, and chips, mix gently until blended.
- Drop onto ungreased cookie sheet in your favorite size.
- Bake at 350 about 10 minutes for heaping-tablespoon cookies, longer for bigger.
- Cool on wire rack, store completely covered. Enjoy at least one while hot!

*To toast coconut in oven: Sprinkle in an even layer on a cookie sheet, place under broiler, turn on. Watch carefully! Stir if needed, toast until browned. To toast on stove top: Heat dry frying pan over medium-high. Sprinkle in coconut, stir gently until browned.

Sunday, January 18, 2009

Pear Oven Pancake

My mom had an old recipe box with recipes written on 3x5 cards where this was called "Galette," but I have never seen it called that anywhere else. It was a yorkshire pudding recipe that added cinnamon and nutmeg while replacing the meat drippings with butter. I've been cutting the butter in half for years, but today I decided to take it out completely and was really pleased with the result (at least in a glass pan!) Cooking Light has a good apple one here but it takes about an hour to make, and is so good that I tend to eat half of it, which defeats the "light" part. I usually make this with apple, but I had a pear, so I used it.

Pear Oven Pancake
Prep time: 10 min Cook time: 25 min Serves: 1-2

1 egg
1/2 cup milk
1/2 teaspoon cinnamon
1/4 teaspoon nutmeg
1/2 cup flour
1/4 teaspoon baking powder
1 pear (apple, dates, or other fruit would work, too)

- Preheat oven to 425 and put in empty pie plate to heat
- Slice fruit (1/8 to 1/4 inch thick, or halve dates)
- Combine egg, milk, and spices in a small bowl
- Add flour and baking powder to wet ingredients; stir until it's all moist (it will be lumpy)
- Remove pie plate from oven, spray with cooking spray
- Arrange fruit on the bottom of the pie pan
- Pour batter over fruit
- Cook at 425 for 25 minutes

You can leave out the fruit or double the recipe in one pie pan. If you double it, turn the heat down to 375 after 10 minutes and cook until the top is golden brown.

Nutrition facts (whole recipe, with pear):
Fat: 6.6g Cal: 470 Pro: 17 g Carbs: 88

Apple version (show to the right with Satisfying Hot Chocolate):