Thursday, May 28, 2009

Sun-Dried Tomato Pesto

Another one from Cooking Light, with the original recipe here, this was so much easier than I would have expected, and fun. It calls for oil-packed sun-dried tomato, but instead we used a dry kind of "sun ripened" that our store had in the dried fruit section. I think they were a bit softer than usual sun-dried tomatoes, so if you use dry sun-dried, I would soak them in warm water for 2-3 minutes. We also added a little olive oil since the tomatoes would normally have some.

Pasta with Sun-Dried Tomato Pesto and Feta Cheese
Serves 4

1 (9-ounce) package refrigerated fresh linguine (This is the exact size of the Buitoni package)
3/4 cup sun-dried tomatoes
1 teaspoon olive oil
1/4 cup loosely packed basil leaves
2 tablespoons almonds
2 tablespoons grated fresh Parmesan cheese
1 small clove garlic
1/2 teaspoon salt
1/4 teaspoon black pepper
1/2 cup (2 ounces) crumbled feta cheese

- Cook pasta according to the package directions, omitting salt and fat. Drain through a sieve over a bowl, reserving 1 cup cooking liquid. Return pasta to pan.

- While pasta cooks, place tomatoes and next 7 ingredients (through black pepper) in a food processor; process until finely chopped.

- Combine tomato mixture and the reserved 1 cup cooking liquid, stirring with a whisk. Add to pasta; toss well to coat. Sprinkle with feta.

Wednesday, May 27, 2009

Best ever coffee for one

Not a single person from my known audience drinks coffee. Some may even doubt it has any healthy qualities. So this is mostly because I think it's cool.

Key 1: Freshly ground coffee is best. I don't have a grinder - I don't feel like buying a pricey one, the reviews for cheap ones aren't that great, they sound sort of messy and I don't need another gadget in the kitchen. Instead, I buy mine from the supermarket and use their grinder. Be sure to run the grinder first and lift the flap because there are loads of inconsiderate people that leave beans in there - and you want the kind you picked, not some weirdo mix from what the last guy wanted! Grind as much as will last you til your next trip on a setting around auto drip to use my favorite method (try it and see how it goes - I find espresso grind doesn't taste as good for this.)

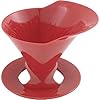
Key 2: Melitta one-cup cone filter holder. I love it. If you don't know what it is, I put a pic below. You can easily make a nice 6-16 ounce cup from this. It's $3 for the cone, and filters are cheap, too. You put the filter into the cone, your coffee (2 Tbs/8 oz cup) into the filter, and pour in water that was brought to a boil and then allowed to cool for 15-30 seconds (I use an electric kettle). Fill it up all the way once for a small cup, or refill with water for a larger cup. Super quick, super good, and SOOO much better than instant! If I want a cheap mocha, I just put hot cocoa mix into the cup and let the coffee mix in as it drips from the filter.

Tuesday, May 26, 2009

Strawberry Raisin Bran Muffins

In elementary school, if we didn't eat all of our cereal for breakfast, my mom would put it all in one big bowl and while we were gone she'd make muffins for our after-school snack. (Yep, we had after-school snacks - pretty often, even. One benefit of having a stay-at-home mom.) I've found out that some people are grossed out by this, but it worked well. I'm not saying here to use the exact method, but it did give me an idea when the box of raisin bran got stale. I didn't want to revive it, using yesterday's method, because I didn't want the raisins to get hard. Instead I made muffins. This will work with any kind of cereal, but using raisin bran has the benefit of at least seeming healthy. I also had some strawberries that were in danger of getting moldy, so I threw them in, but the recipe would work with apples, craisins, or no additional fruit. This recipe does take longer, but the use of stale cereal is worth the time in my book.


Strawberry Raisin Bran Muffins
Makes: 18 muffins

3 1/2 cups Raisin Bran cereal (any brand, really)
1/2 tsp salt
1/2 tsp baking soda
2 1/2 cups all-purpose flour
1/4 cup oil
1/4 cup plain nonfat yogurt
3/4 cup granulated sugar
2 eggs
2 cups buttermilk (I used 2 T of white vinegar and enough 1% milk to make 2 cups)
1 1/2 cups strawberries, diced

- Mix the dry ingredients (including cereal) in a large bowl
- Mix the wet ingredients in a medium bowl and add to dry mixture. Mix in fruit.
- Let sit at least 45 minutes
- When ready to bake, preheat oven to 400. Lightly grease muffin tin or use liners and fill cups completely (does not rise very much).
- Bake at 400 for 20-25 minutes. Tops will be light brown.

Nutrition info per muffin: Cal: 183 Fat: 4.3 g Carbs: 33g Protein: 6g
(As a comparison, Starbucks bran muffins, which are bigger, have 420 cal, 19 grams of fat, and 58 carbs)

Monday, May 25, 2009

Revive stale cereal and chips

My mom used to do this when I was little, and I've had loads of people think I'm nuts, but it seriously works! I hadn't had stale stuff in a while - until one day we left the windows open when it was like 100% humidity outside. And then a lot of the cereal got a little funky. Yes, things get stale because of moisture. In their bags, they are nice and safe, but then air and its moisture get to them and take the crunch right out. Do not despair, there is hope! Just do not walk away! CornPops, for example, can make some big flames for quite a long time.

Revive stale cereal, chips, or crackers
Serves as many as you like

- Take your stale food and put it in a thin layer on a cookie sheet or the tray of your toaster oven.
- In the toaster oven: set to toast. Watch carefully, and stir every 30 - 90 seconds. At the first sign of browning, remove from oven, let cool, and eat as usual.
- In the conventional oven: Put rack on second highest shelf. Turn on broiler. Watch carefully, and stir every 30-90 seconds. At the first sign of browning, remove from oven, let cool, and eat as usual.

I've never tried this with potato chips, but it definitely works for tortilla chips. If you serve chips or crackers warm, it gives them a bit of a restaurant feel. If you serve cereal warm, do it as a snack without milk. With milk it's just sort of funky, warms the milk, and gets soggy fast. Don't try it. Seriously.

Sunday, May 24, 2009

Southwest Couscous Salad

I can't believe I've put up so few couscous recipes! Well, time to fix that. This one has a southwestern kick to it with the kidney beans and salsa. It works as a main dish or a side. If you feel the need for meat, I would chop it up and pan fry it with minimal oil (or cooking spray) and season with cumin, chili powder, and garlic salt (or any blend to your liking.) It's served cold, which makes it perfect for parties or making ahead. If you use frozen corn, the corn cools the couscous and the warm couscous thaws it, so you can also make it right when you want to eat. Leftovers are good for lunch, too.

Southwest Kidney Bean Couscous Salad
Serves: 4 as main dish, 2-3 as a one-dish meal, or 4-8 as side.


3/4 cup uncooked couscous (I use whole grain)
3/4 cup water
1 (15 oz) can kidney beans, rinsed and drained
1/2 cup salsa
3/4 cup frozen corn
1 medium bell pepper, diced (I used green because I had it)
1/4 cup onion, chopped
1 tsp cumin

- Boil water in a small saucepan. When water boils rapidly, remove from heat, add couscous, and cover. Let sit 5 minutes while preparing vegetables.
- Chop up the pepper and onion. Place in a large bowl. Add beans, salsa and corn to bowl.
- Once couscous has sat for 5 minutes, add to bowl and fluff with a fork (even if everything else isn't in the bowl yet.)
- Mix with a fork and serve immediately or cover and chill in fridge until serving.
- Topping options: Top with cheese (jack, cheddar,pepper jack, feta) or sour cream.

Nutrition info (for 1/4 of recipe using regular couscous): Cal: 528 Fat: 1.9g Carbs: 100 (but 20g of fiber) Protein: 30g

I AM BACK!

Ok, I really doubt that I had any readers *to* lose, but that's probably for the best, considering my major lapse in posting. The semester caught up with me and I have finally finished everything, recovered from the craziness, and started looking for and trying out new recipes. And........ I am trying to take pictures! Yay, food pictures so that my tasty things will have lovely visuals. More to come, starting today...

Sunday, March 8, 2009

Tunisian Almond Pastries

One thing I miss from Tunisia is the pastries. They were so rich and so good! They often use nuts in their pastries, and that is the main ingredient here. I'm not sure of the name in Arabic, I think it's kaaber louz, and in French they are Boulettes aux amandes. I like the flavor - it reminds me a lot of sugar cookie dough. We have a 3 pound bag of almonds, so I decided to make some and was pleased by how quick and easy they are! Ideally, you should use blanched almonds for a lighter flavor and color, but regular ones worked fine, too. A common practice is to either cover the outside in nuts (almonds, hazelnuts, or pistachios) or to color 1/3 of the dough red, 1/3 green, and to roll bits of all 3 together to make multi-color balls. If you blanch the almonds yourself, it will definitely take you longer to make these!

Tunisian Almond Pastries
Serves: 6-8

Dough:
1 1/2 cups almonds
1 2/3 cups powdered sugar
2 tablespoons water (for more authentic taste, use rose water or orange flower water)

Syrup:
3/4 cup granulated sugar
1 cup water

- Combine syrup ingredients in a small saucepan and heat over medium-high, stirring occasionally, while you prepare the dough.
- For the dough: Powder almonds in a food processor (blender might work, but do just part at a time.) In a bowl, combine almonds and powdered sugar. Add water a tiny bit at a time, stirring to blend. You want the dough to barely cling together, and you may not need the whole 2 tablespoons. Form the dough into balls about the size of a tablespoon.
- When syrup has thickened remove from heat (about 10-15 minutes - when boiling, the bubbles stay on the surface for a second and look almost soapy).
- Coat each ball in syrup. You can stop there, or then roll in chopped nuts to coat. You can eat right away, or let sit for an hour to firm up more. Should last for 1-2 weeks in an air-tight container.

Here's the first batch I made, too. They weren't quite as pretty.

Friday, March 6, 2009

Homemade Pita chips

I like pita bread. I like pita chips. I don't get why 6 oz of pita chips should cost me more than 5 whole pitas (12 oz.) These are really good chips, and go well with any dip, though I like them with my yogurt hummus or, like I'll do today, with guacamole. I use whole wheat pitas because I like the flavor, but any kind will work.

Pita Chips
Serves: 4

4 whole pitas
Cooking Spray

Preheat oven to 425. Cut each pita in half. Split the halves of the pita (like where the pocket would usually be) and spray each side lightly with oil. Cut each piece into 3-4 chip-size triangles.* You will have 12-16 triangular chips from each pita. Spread out onto a baking sheet in one layer. Bake in 425 degree oven on top rack for about 3 minutes. Stir chips around, and bake an additional 2-3 minutes, until brown in spots. VERY important to watch these as they can quickly go from almost-done to burnt.

*If your time is more important to you than uniform chips, bake the large sections and break them up by hand afterwards.

Tuesday, March 3, 2009

Tuna melts

Simple? Maybe. But they seem sooo much fancier than just a tuna sandwich with cheese. I don't mix the tuna with anything before putting it on the bread to give it a more delicate flavor. It also means that it doesn't stick together the same way as a traditional tuna melt, so to make it more kid-friendly, mix in a couple tablespoons of mayo, dijon mustard, or salad dressing. We eat ours with tomato & red pepper soup.

Tuna melts
Serves: 2-3 people per can Prep time: about 20 minutes (depends on size of pan and number of sandwiches)

1 can tuna
1 medium tomato
2 slices cheese per sandwich (I like pepperjack)
2 slices bread per sandwich
Cooking Spray

- Turn a large frying pan, skillet or flat stove-top grill to medium-low heat.
- Open and drain can of tuna. Stir in mayo, etc. if you wish.
- Slice tomato into thin slices.
- Spray pan with cooking spray, place bread in single layer in pan. Spray top sides with cooking spray. Let cook 2-3 minutes, until bottom side is light brown.
- Turn over one slice of bread per sandwich. Place 2 slices of cheese on bread and top with 1/2 or 1/3 of can of tuna and tomato slices.
- Put the other slice of bread on top, making sure that the side browned in the pan is facing the tomato & tuna. Let cook for 2-3 minutes, until bottom side golden brown.
- Flip and cook and additional 2-3 minutes, until final side is golden brown.

Sunday, March 1, 2009

Thick Chicken Chili

I made this in my little crockpot, so it ended up being much more chicken-y than I expected. A smaller chicken breast could be good, or just plan to put it on top of rice, noodles, or tortillas. This was quicker than I expected, and when I put in the info, the protein in this is insane!

Thick Chicken Chili
Hands-on time: 15 min Cook time: 7+ hours
Serves: 3-4

1 chicken breast, thawed and trimmed
1 (14-16 oz) can diced tomato, with juice
1 (14-16 oz) can kidney beans, drained (but not rinsed)
1 bell pepper, chopped
1/2 medium onion, chopped
1 tsp cumin
1/2 tsp chili powder
Toppings (optional - cheese, chopped onion, plain yogurt/sour cream)

- Put all ingredients into crock pot. Stir. Plug in and cook on low at least 7 hours. I left mine for 9.
- Before serving, stir to break up chicken into small pieces.

Nutrition info (for 1/4 recipe): Cal: 466 Fat: 3.1g Carbs: 73g Protein: 39g