Thursday, March 4, 2010

... and Grapefruit Curd

This is sort of the second half of Tuesday's healthy pancake post. I made them together, but I think that they are each worth their own post. This was amazing. I read recently that you can make curd (like lemon curd) with any citrus, and really wanted to try it. Then I found a butter-free curd recipe. The grapefruit were purchased. A day later, I found a great looking healthy pancake recipe. On top of that, the pancake recipe gave the option to use just whites. Leaving me some yolks for the curd. Too perfect of a coincidence to pass up.

I decided to make just a half batch (ok, I didn't have enough eggs for a whole one) and, to be honest, I'm not sure if this ever sets up the way I know lemon curd does. It didn't make it to the fridge, I stirred it up while the pancakes were cooking and it was all devoured. Well, not all on the pancakes. Some on yogurt. I became a serious fan of grapefruit yogurt in France. It's such a good combination! Why isn't it in the US? (With rhubarb and fig and pineapple yogurt, too!) I realized that this would make great grapefruit yogurt. The sugar gives it enough sweetness, yet the grapefruit and the plain yogurt keep it tart. A winner in my book.

Grapefruit Curd (Can be made with any citrus!)
Serves: 6-8 Time: 15-20 minutes, more if you want to wait for it to cool

1 cup freshly squeezed grapefruit juice
2 tsps finely grated zest of grapefruit
3/4 cup granulated sugar
pinch of salt
2 large eggs
2 large egg yolks

- Place a mesh strainer over a bowl and set aside. [If you want to strain it, I didn't, but I did have a couple of cooked bits of egg in the end result.]
- In a heavy medium saucepan, stir together the grapefruit juice, zest, sugar and salt. Bring to a simmer over medium heat.
- In a small bowl, beat the eggs and egg yolks to break them up. Beat some of the grapefruit mixture into the eggs to temper. Scrape the mixture back into the saucepan and cook over medium heat, stirring constantly, until it thickens and just begins to become jelly-like, about 5 minutes.
- Remove the curd from the heat and press the curd through the strainer. Press a piece of plastic wrap onto the surface of the curd (this prevents a "skin" from forming) and let it cool completely before using. [I didn't do this either, obviously :) I just used it directly.]

Nutrition info (1/8th of recipe): Cal - 113 Fat - 2.4g Protein - 2.4g Carbs - 21.4g

Tuesday, March 2, 2010

Oatmeal Cottage Cheese Pancakes (Easily gluten-free, too!)

I love me my pancakes. I've probably said that before. It's sad, though, that they have so little nutritional value. Makes it harder to just make them and eat them. But then I came across this recipe that I just HAD to try. Oatmeal cottage cheese pancakes? Yes, please! It's really cool. It's oatmeal. Cottage cheese. And eggs (or egg whites). Simple enough? I think so. I was a little skeptical of how they might taste, but I really should not have been. I shared a few bites with my taste-testers, who were shocked at how simple and healthy it was. And I put a delicious butter-free grapefruit curd on it to give it a kick flavor. That definitely helped. But the grapefruit curd has its own post. Let's focus on the pancakes for now.

The recipe tells you to blend it all up in a blender or processor, but if you have quick oats (what was on hand in the kitchen the first time I made them) you can just mix it with a spoon. It gave it a really nice texture that everyone appreciated. If you have old-fashioned oats, you REALLY need to at least blend (or food chopper) those a bit  in a blender or processor so that they make a more cohesive batter. The batter is already thick and I spread it out with the measuring cup I was using for a scoop. I used 2% cottage cheese this time, but I would try it with small curd whole milk cottage cheese, too. The original recipe used all egg whites, but I used a mix (some of the yolks went into the topping).

I had these around lunch time, and they all disappeared or I would have saved some for a snack. They are hearty enough for that. And are good with peanut butter, too. The cottage cheese and egg combination puts them through the roof in protein, and oatmeal is (obviously) a whole grain. You can also make it gluten-free if you use gluten-free oats! To make it any more nutritious, it.... I can't think of anything.

Mmmm... blueberries & lemon curd!

Made in the blender - Brown nicely and no burn marks!
Oatmeal Cottage Cheese Pancakes
Serves: 2-3 Time: Depends on your pan/griddle size - 20-30 minutes

1 cup cottage cheese
1 cup oatmeal (quick or old-fashioned) (Gluten-free is an option, too!)
4 eggs or 8 egg whites
Butter or spray oil for pan

- Turn on pan or griddle to medium or medium high
- With quick oats: Mix all ingredients in a bowl or in a processor/blender
- With old-fashioned oats: Process/blend oats and add to bowl with other ingredients, mix (or blend/process all of it for a smoother batter)
- When pan is hot, butter or spray with oil
- Pour into pan using 1/4 to 1/3 cup per pancake. Flatten with scoop if you did not blend it.
- Cook on first side until edges look done and a few air bubbles stay at the surface
- Flip, cook until the color you like is reached

Nutrition info (1/3 of recipe, with 4 eggs): Cal - 255 Fat - 9.1g Protein - 21.3g Carbs - 21.6g

Nutrition info (1/3 of recipe, with 8 egg whites): Cal - 213 Fat - 3.4g Protein - 23.5g Carbs - 21.8g


The dark spots in the picture are where the cottage cheese was at the surface, it didn't taste burnt at all.
Made without a blonder or processor, bigger oatmeal chunks and don't stick together as well. Still tasty!

Saturday, February 27, 2010

Saturday Splurge: Graham Crackers

If you couldn't tell, I have gotten into reading other food blogs. I think it takes the place of food network. Now that I don't have tv, my recipe and cooking and baking tips are from other 'real' people. I like that. And my time isn't getting spent on tv, so it's like this totally takes the place. One food blog that I am particularly impressed by I've mentioned a bunch of times, but this recipe was found on hers again.

I love chocolate covered graham crackers. When I was an undergrad, the campus convenience store carried a brand of them, round bite-size ones, that I would get allll the time. We got to use our meal cards there, so it was like any other food. It was fantastic. Well, the brand either quit making them, or they are just hard to find. I have looked many, many places. Other people make them, too, but the ones in the grocery store aren't that great. I love the Brown & Haley ones, but I am not a walk away from the little pink house anymore. And even the real brand graham crackers with melted chocolate on top just aren't the same.

So, I decided I would find a graham cracker recipe and put chocolate on it. I figured it might take a bit of a search. I knew Alton had one, but wanted to see if others did, too. And then I ran across SK's graham cracker recipe, entirely by accident. Wonderful with chocolate, thank you! I had some of my testers taste them without telling them what they were. Two people said "graham crackers!" right off, but several others couldn't place it. When I told one, she said "I was thinking that, but this is much too delicious to be a graham cracker." I'll take that.

I should point out to my non-US readers that these are not really crackers. They are a thin, crispy cookies. And soooo good. If you try them while still warm, they are not at all crispy. I did this at first and was very disappointed. Until my second cracker, 5 minutes later, crunched perfectly in my mouth.


Graham Crackers
The topping amount will make a heavy coating, like the store-bought ones. Make only half if you just want a light-to-moderate sprinkling.

Makes 10 4 x 4.5-inch graham crackers or 48 2-inch squares

2 1/2 cups plus 2 tablespoons (375 grams) unbleached all-purpose flour (a swap of 1/2 cup with whole wheat flour or 1 cup whole wheat pastry flour works well here, too)
1 cup (176 grams) dark brown sugar, lightly packed
1 teaspoon (6 grams) baking soda
3/4 teaspoon kosher or coarse sea salt (4 grams)
7 tablespoons (3 1/2 ounces or 100 grams) unsalted butter, cut into 1-inch cubes and frozen
1/3 cup (114 grams) mild-flavored honey, such as clover
5 tablespoons (77 grams) milk, full-fat is best
2 tablespoons (27 grams) pure vanilla extract

Topping (optional)
3 tablespoons (43 grams) granulated sugar
1 teaspoon (5 grams) ground cinnamon

Make the dough: Combine the flour, brown sugar, baking soda, and salt in the bowl of a food processor fitted with the steel blade or in the bowl of an electric mixer fitted with the paddle attachment. Pulse or mix on low to incorporate. Add the butter and pulse on and off on and off, or mix on low, until the mixture is the consistency of a coarse meal.

[Alternately, if you don't have a food processor or electric mixer, you can cut the ingredients together with a pastry blender. Just make sure they're very well incorporated.]

In a small bowl, whisk together the honey, milk, and vanilla extract. Add to the flour mixture and pulse on and off a few times or mix on low until the dough barely comes together. It will be very soft and sticky. Lay out a large piece of plastic wrap and dust it lightly with flour, then turn the dough out onto it and pat it into a rectangle about 1-inch thick. Wrap it, then chill it until firm, about 2 hours or overnight. Meanwhile, prepare the topping, if using, by combining the sugar and cinnamon in a small bowl and setting aside.

Roll out the crackers: Divide the dough in half and return one half to the refrigerator. Sift an even layer of flour onto the work surface and roll the dough into a long rectangle about 1/8 inch thick. The dough will be sticky, so flour as necessary. Trim the edges of the rectangle to 4 inches wide. Working with the shorter side of the rectangle parallel to the work surface, cut the strip every 4 1/2 inches to make 4 crackers. [This makes a traditional graham cracker shape. Any shape will work.]

Place the crackers on one or two parchment-lined baking sheets and sprinkle with the topping. Chill until firm, about 30 to 45 minutes in the fridge or 15 to 20 minutes in the freezer. Repeat with the second batch of dough. Finally, gather any scraps together into a ball, chill until firm, and re-roll.

Adjust the oven rack to the upper and lower positions and preheat the oven to 350°F.

Decorate the crackers: Mark a vertical line down the middle of each cracker, being careful not to cut through the dough (again, this is for the traditional cracker shape). Using a toothpick or skewer (SK uses the blunt end of a wooden skewer for more dramatic dots), prick the dough to form two dotted rows about 1/2 inch for each side of the dividing line.

Bake for 15 to 25 minutes, until browned and slightly firm to the touch, rotating the sheets halfway through to ensure even baking. [The baking time range is long because the original recipe calls for 25 minutes SK's oven took 15, the convection oven here took about 10.]

Tuesday, February 23, 2010

Creamy Tomato Basil Soup (and oven-grilled cheese sandwiches)

I don't like tomato soup from a can. I do like one brand's roasted red pepper tomato soup, but it's a box. And I always add tobasco to that anyway. I'll eat canned tomato soup now and then, particularly with grilled cheese, but only after adding garlic powder and basil. Makes it much better. Once in Tunisia I tried to make tomato soup because you can't get it there. I based it on my own ideas of how soup my come about, using tomato paste. Disaster; not recommended. However, I knew with a recipe I could do better than the can. Last week for lunch, I decided I'd try it out for my building. Definitely worth it. It was honestly very easy and fun to make (the immersion blender is my new best friend) and everybody seemed to like it. Somebody asked if it was from scratch, and when I said yes it really surprised a few.

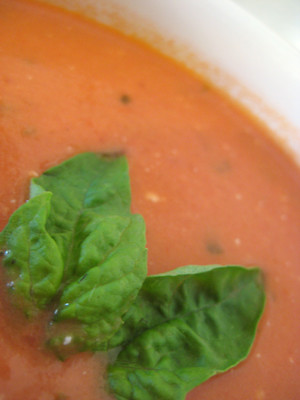
I forgot to take a picture (note to self: take camera to making lunch) but I found one that is the same color as mine was. She actually used a recipe from Cooking Light, but I don't think their changes are worth it (unless you have cream cheese instead of heavy cream on hand.) They save 1.8g of fat per serving, but it's not high to start with and if you have cream cheese, you're going to get sodium and other things that you won't have in the plain cream. It's up to you. For the tomatoes, do try to find low-sodium or no-salt-added if you can or else you'll have half your daily sodium intake in one bowl. I'm also adding the directions for grilled cheese in the oven, because when you're making lots, a pan is just too slow.

Creamy Tomato-Basil Soup (apparently like at La Madeleine)
Serves: 8 Cook time: About 40 min

4 cups canned crushed (or diced) tomatoes (or fresh chopped tomatoes) with juice
4 cups tomato juice OR 2 c tomato juice and 2 c vegetable/chicken stock
14 washed fresh basil leaves
1 cup heavy cream
Salt to taste
1/4 teaspoon cracked black pepper

- In a saucepan, heat the tomatoes, tomato juice, and stock (if using) on medium until hot all the way through (fresh tomatoes will need a while here, maybe 20 minutes)
- Blend in the basil leaves (in a blender, processor, or with an immersion blender) so that the tomatoes are all blended up.
- Add the cream and pepper, as well as salt to taste
- Stir 5-10 minutes or until hot enough for you.

(If you want to make this ahead, just leave out the cream until you re-heat it.)

Nutrition Info (1/8 of recipe, using tomato juice): Calories - 123 Fat - 5.6g Protein - 4.3g Carbs - 15.6g


Grilled Cheese, oven style

- Preheat oven to 425
- Put the bread and cheese however you'd like. Throw on ham or turkey or tomato or even a fried egg. The sandwich should be completely assembled (bread, cheese, bread all together) on a baking sheet
- Place in oven for 4 minutes
- Flip sandwich, let cook 3 more minutes or until cheese is thoroughly melted

Yep, that easy! Mine came out nicely golden brown without any butter, but of course you can do butter or spray oil if you like.

Saturday, February 20, 2010

Saturday Splurge: Beyond Cocoa Brownies

Brownies. Growing up, like so many people, brownies were a common thing in my house. The Betty Crocker page was smudged with cocoa and butter and who-knows-what-else that missed the bowl (or got thrown out when lifting the stand mixer top - oops!) One thing that always seemed sad about brownies was that we basically never had baking chocolate. I'm not exactly sure why. My mom kept loads of baking supplies around. For a while, I made chocolate chip cookies every Sunday (and would take some to friends). Valinda made potato donuts once a week for maybe 6 months. (mmmm.... homemade donuts!) Our brownies, however, were constantly cocoa brownies. And it was sad. Because every time I made them, I put in the butter flavored shortening (in the days before we knew about evil trans fats) and the cocoa and wondered how they'd be with chocolate.

Since then, I have indeed made brownies with chocolate. They can be insanely good and rich. I also have realized the joys of the quick box of brownie mix. Plus it's so versatile. In my building, we do get cocoa now and then. But baking chocolate? Nope, not gonna happen. I had decided I wasn't going to make brownies. Other people were welcome to, but I didn't want to give in and have the lame attempt that just was never quite right. Until I read this post. With this recipe.

Wait..... cocoa can be an INTENTIONAL brownie ingredient?? How did I never know?? Why did I go so many years without this knowledge?? And so, Hershey's in hand, I went for it. And am I (and the 40 other people who had some) ever happy that I did. I actually had trouble convincing people they didn't have any melted chocolate, just cocoa. I call that true success. The recipe has my description, with extra comments in [brackets]. I made a quadruple batch and it even worked just fine. Impressive. And so pretty! I am sure they'd be perfect with crème anglaise, but remembered that I am, in fact, a student and studying won out over testing the theory. Another day. For sure.

Best Cocoa Brownies
Adapted from Alice Mendrich’s Bittersweet
Makes 16 larger or 25 smaller brownies [I cut it into the smaller ones, and everyone I heard from said that it was the perfect size.]
10 tablespoons (1 1/4 sticks, 5 ounces or 141 grams) unsalted butter
1 1/4 cups (9 7/8 ounces, 280 grams) sugar
3/4 cup plus 2 tablespoons (2 7/8 ounces, 82 grams) unsweetened cocoa powder
1/4 teaspoon salt (or a heaping 1/4 teaspoon flaky salt)
1/2 teaspoon pure vanilla extract
2 large eggs, cold
1/2 cup (66 grams, 2 3/8 ounces) all-purpose flour
2/3 cup walnut or pecan pieces (optional)

Preheat the oven to 325°F. Line the bottom and sides of an 8×8-inch square baking pan with parchment paper or foil, leaving an overhang on two opposite sides.
Combine the butter, sugar, cocoa, and salt in a medium heatproof bowl and set the bowl in a wide skillet of barely simmering water. Stir occasionally until the butter is melted and the mixture is smooth. If you prefer, you can also just melt the butter and mix it all up - I've done it both ways and the only difference I notice is the texture of the sugar. It will probably look like dark, wet sand, but that's fine.
Stir in the vanilla. Add the eggs one at a time, stirring vigorously after each one. When the batter looks thick, shiny, and well blended, add the flour and stir until you cannot see it any longer, then beat vigorously for 40 strokes OR with a paddle attachment in a mixer (for the quadruple batch this was necessary!!) Stir in the nuts, if using. Spread evenly in the lined pan - this is THICK, so you will need to spread it.
Bake until a toothpick in the center emerges slightly moist with batter, about 30-40 minutes. Let cool completely on a rack if you are patient. You can put it in the fridge or freezer to get a cleaner cut, or cut with plastic while hot. [I actually use the back side of the spatula that came with my food processor.)
Lift up the ends of the parchment or foil liner, and transfer the brownies to a cutting board. Cut into 16 or 25 squares.

Friday, February 19, 2010

Spicy Peanut Chicken

This is a favorite of my in-laws. It's quick, easy, doubles (or quadruples) well and is yummy.

Serves 4 - 6 (4 adults or 2 adults, 3 semi picky kids and enough for 1 leftover lunch)

1/4 c chicken broth (I usually cheat and use bouillon and water)
1 T. cornstarch
1 T. brown sugar or honey
2 T. soy sauce
1 T white vinegar
1/4 t cayenne pepper
1 T. vegetable oil
2 - 3 boneless skinless chicken breast halves cut into bite size pieces
1 clove garlic ( I always add more)
1 t. ginger (I keep fresh ginger in the freezer so it's easier to grate)
1 red bell pepper cut into small pieces
1/3 c peanuts
2 green onions

Mix broth, cornstarch, sugar, soy sauce, vinegar, and red pepper. Heat wok (or skillet) over high. Add oil, chicken, garlic, and ginger. Stir fry 3 minutes or until chicken is done. Add bell pepper; stir fry 1 minute. Add cornstarch mixture to pan. Cook and stir 1 minute or until sauce thickens. Stir in peanuts. Garnish with green onions. Serve over hot rice.

To adjust spiciness use more or less cayenne pepper.

Thursday, February 18, 2010

Peanut Butter & Jelly bars

After the first try with food bars was such a great success, we decided that a variation was in order: peanut butter and jelly bars. So, I went about deciding what to replace here and there, baked them up, put chocolate over half, and........... it was gross. Well, gross compared to what I had hoped, not plain gross. Just not good. It tasted like a power bar. Ok, filling, definitely food-like, but not right. There wasn't much fruit flavor (I had used plums) or peanut butter flavor, and the peanuts had turned soft. Once we made it through most of those (I think one or two got too old first, that should tell you how bad they were) we decided to try again.

I had been thinking since the first bite of the bad batch that there had to be a better way.
The first trick seemed to be keeping the peanut halves crunchy.
Solution: Don't bake it.
The second was to make the fruit flavor hold its own.
Solution: More fruit with a stronger flavor.
The third was to find a recipe that I could adapt instead of starting from scratch.
Solution: here. The first time I made just a half-batch, since I was reeling from the terrible first attempt, but they went before I even snapped a picture!

Just like the food bars, the nutrition info on these is surprisingly similar to the pre-made bars you can buy. These are a tiny bit higher in fat, but as they cost less and have no chemically taste (especially if you use wheat germ) I am perfectly ok with that.

The second batch was easier to mix, but doesn't hold together quite as well, so I have adjusted the proportions a bit. Both of those were with craisins. For the third batch, I decided to go with dried apricots (what I had on hand) and it was really good, too, but certainly has less of a fruity taste. The apricot flavor got stronger over a few days, but who wants to wait? The craisins were great and tasted good and properly fruity, not too tart at all. Either way, I kept them in the fridge to encourage them to stick together and to make them last longer. I know I took pictures of the ones with cranberries, but here is the unpressed mound of apricot bars until I find it.

Peanut butter and Jelly bars
Serves: 6-8 Time to make: about 20 minutes, then let cool

1/2 cup honey
1/2 cup good peanut butter (like just peanuts, or peanuts & salt)
2 tablespoons maple syrup
1/4 cup brown sugar
1 tsp vanilla
2 3/4 cups old fashioned rolled oats
1/4 cup whey protein powder or toasted wheat germ
1/2 cup roughly chopped peanuts (or halves)
1 cup dried apricots (roughly chopped) or dried cranberries

- Coat a square 8x8 pan with cooking spray
- (You can wait to do this until the liquids are heating if you're quick) Combine last four ingredients (oats through dried fruit) in a medium bowl and stir
- In a small saucepan, heat honey, peanut butter, maple syrup and brown sugar over medium heat, stirring occasionally, until they start to boil
- Remove from heat, add vanilla, stir until blended, and pour over dry mixture
- Mix until all of the ingredients are wet, pour into 8x8 pan and press down FIRMLY until it is all flat (you may want to use plastic wrap, tinfoil, or parchment paper so your hands don't get sticky)
- Chill in the fridge at least 2 hours. Once chilled, cut into 16 bars (I make mine long skinny ones)

Nutrition info (for 1/16th recipe with toasted wheat germ and apricots): Cal - 194 Fat - 7.5g Carbs - 27.3g Protein - 6.4g

I can't find a good set of nutrition facts for the protein powder, but it's lower in fat than wheat germ and (duh) much higher in protein, so you will have a slightly different balance there.

Tuesday, February 16, 2010

Chipotle corn chowder

I wanted to make chipotle corn chowder for lunch in my building, but couldn't find the recipe I had before (ha, if I had one! I may have made it up to begin with.) In my search, I found this fantastic one from Kait's Plate. What makes it so fantastic? Sweet potatoes! They are so good and full of nutrients and just a lot more fun than regular potatoes. What's not to like?? It is filling because of the heartiness of the potatoes, a little bit creamy because of the cream and butter, and has a good flavor. I almost always adjust spices in recipes, but all I did here was add a bit of cumin, though it honestly didn't need it. Next time I may use an immersion blender on it for a few seconds, just to give it a little more thick stuff holding it together.

I admit that this was not AT ALL quick when making about 70 servings. Yep, we used 32 pounds of sweet potatoes. Do you realize how long those take to peel? And chop?? To be perfectly honest, I may not have felt so ambitious if I had known. But now that it's done, I am happy. Because it was quite tasty. Spicy enough to deserve the name, but mild enough that nobody got a runny nose or thought it was too hot. A couple of "not soup people" even went back for seconds. And it was extra wonderful because dinner turned out to be so.... sparse. I was one of the last ones in line, so several things were out by the time I got there and I ended up with asparagus and zucchini in tomato juice. Hmmm... Luckily I know how to find other food :)

I made two versions: one veggie, one chicken. For the veggie one, I used vegetable stock to make it truly vegetarian. If I were to make it just for myself, I'd use chicken stock and then just not put in chicken. That's why they call me a 'fake vegetarian' around here. For the chicken one, we had 10 lbs of chicken, so for a single recipe that would be... 2.5 lbs. It was a lot, though, far too much I think, so I'd actually suggest 1.5 lbs, max.

Chipotle corn chowder
Serves: 8 Cook time: 40 minutes (that's quite a guess!)

3 tbsp. butter
3-4 lb
sweet potato, peeled and cut into 1 inch cubes
1 large onion, diced
3 tbsp. all-purpose flour
1 quart chicken stock
½ lb. frozen corn kernels
2 chipotle peppers in adobo sauce, finely chopped
½ cup heavy cream
5 thyme sprigs
Salt and freshly ground pepper
Cilantro

- Heat butter in a large pot over medium heat.
- Add sweet potatoes and onion and cook 5 minutes.
- Add flour and stir into the onion and sweet potato.
- Gradually add chicken stock while stirring.
- Add corn, chipotle peppers, cream, and thyme and bring to a simmer.
- Reduce heat to low and simmer about 10-15 minutes, or until the sweet potatoes are fork-tender but not falling apart.
- Remove from heat and season to taste with salt and pepper.
- Garnish with cilantro (or avocado or tortilla chips, if you like).


Nutrition info (1/8 of veg recipe, no toppings): Fat - 7.9g Cal - 269 Carbs - 46 Protein - 5.5g

Sunday, February 14, 2010

Cream Puffs

Hopefully we all have fond memories of our moms making, buying, or providing some sort of snack for after school. You know cookies, chips, crackers, sandwiches, pizza rolls if you believe those commercials. At our house our mom made cream puffs. I never even knew people thought they were hard to make and a cool food until I was in high school and my friends were amazed that we had them all the time. I now make them for my girls and for their teachers on special occasions like Valentines day, and yes people were amazed I made them and thought they were a very cool food.

Cream Puffs
1 stick (1/2 cup) BUTTER do NOT use margarine you will be sad.
1 cup water
1 cup flour
4 eggs

Filling
pudding, cool whip, chicken salad, tuna salad, strawberries and whip cream - have fun!

Topping
frosting, powdered sugar, cocoa powder

Preheat oven to 400*. Bring water and butter to a boil in a sauce pan. Remove from heat and quickly stir in the flour. It should hold together in a loose ball. Mix in one egg at a time. Is it really important to do just one at a time? I don't know, I've never mixed in all 4 at once so I can't tell you, I've always respected the one egg at a time rule. Once the eggs are mixed in you should have a firm batter. Scoop the batter onto an ungreased cookie sheet. I usually line mine with parchment paper but it's not a disaster if you don't. How big of a scoop? It's up to you, I make mine in a range of 1/8 c. to 2 tsp. depending on the size of cream puff I want at the end. I made the teacher treats in the 2 tsp size and they came out 2 bite size. Put cream puff in the oven. If you made them 1/8 of a cup scoops you're going to cook them for about 40 minutes, if you went with the 2 tsp size it will be more like 20 minutes. When they are done they will be golden brown on top and all pretty and puffy.

While they bake decide what you are going to fill and if desired frost them with. The ones I made most recently were filled with a pudding cool whip mixture. I made the pudding (the 4 serving size package) and before it set I mixed in about 1/2 a regular size tub of cool whip. Chicken or tuna salad in larger size cream puffs are great for parties. I've made all kinds of fillings and it's fun to experiment.

Once the cream puffs are done let them cool. The easiest way to fill them is to slice off the very top. Remove the insides and plop a dollop of your filling inside. Replace the top and sprinkle on powdered sugar, cocoa powder, or drizzle on some icing. For my treat puffs I fit a piping bag with a long tip and poke it into the side and squeeze it into the puff. I also melted some canned icing and dipped the top of the uncut puff into it.

One batch will make 12 larger cream puffs or 45 2 bite cream puffs.

Once all your puffs are filled and topped enjoy! Impress your friends! Feel fancy on a Tuesday afternoon!

Saturday, February 13, 2010

Saturday Splurge: Brown Sugar Meringue Tart

The book called this one "Caramel Meringue Tart" but it really doesn't taste that much like caramel to me. Absolutely amazingly delicious, yes, but not caramel. It reminded me a little of the brown sugar pie my mom used to make. You know, one of those things that is so rich that you can only eat a 16th of the pie at most (but I could eat a whole regular piece anyway.) This is a French recipe, and supposed to be in a tart pan, which means that it's much more shallow than an American pie. Which means that it's a more reasonable amount of delicious richness than a brown sugar pie. The fluffy cloud of meringue that sits on top also helps balance the filling.

I made this in my building, which is very much tart pan and pie pan-less. Instead, I took two large pieces of the industrial aluminum foil, measured 8.5 inches across the bottom (it asked for a 22cm tart pan) and turned up the edges. Worked pretty well! Of course everyone loved it and it was amazing and delicious. I had to whip the egg whites by hand, so the meringue isn't as shiny as it would have been with a mixer. It was good enough for me, though! You can start making the filling after the shell goes into the oven, and then the meringue shortly before the crust comes out (you don't want the meringue to sit or it will be harder to spread.) And so, without further ado, I present you...

Brown Sugar Meringue Tart
Serves: 10 Prep time: 2 hours ish (that includes chilling time)

For the crust:
2 cups flour
9 Tbs unsalted butter, chilled and cut into cubes
2 Tbs white sugar
1 egg yolk (reserve the white for meringue)
1 Tbs ice water

For the filling:
1 cup plus 1 Tbs brown sugar
1/3 cup flour
8.5 oz milk (1 cup plus 1 Tbs)
3 Tbs unsalted butter
1 tsp vanilla extract
1 egg yolk (reserve the white for meringue)

For the meringue:
2 egg whites
2 Tbs white sugar

To make the crust:
- Sift flour and then work in butter with fingers
- Add the egg yolk and water, knead in until a soft dough forms
- Roll into a ball, cover in plastic wrap and refrigerate 20 minutes
- When chilled, roll out between two pieces of plastic wrap into a circle about 12 inches in diameter
- Place in pie pan (or tart pan, if you have one!) and cut off any excess
- Prick in several places with a fork, cover in plastic wrap, and chill 20 minutes again. At this point, you should also start preheating the oven to 375.
- Line pie crust with tinfoil or parchment paper and fill with pie weights, rice, or dry beans.
- Bake 35 minutes, then remove from oven, remove weights and liner
- Leave on counter until filling is ready

For the filling:
- Put flour and brown sugar in a small sauce pan, making a well in the middle
- Add the milk a little at a time, stirring with a whisk until the mixture is smooth.
- Over medium low heat, add butter, stirring constantly for 8-10 minutes, or just until the mixture comes to a boil and thickens some
- Put egg yolk in a small bowl. Add about a cup of the hot mixture to the egg yolk, stirring constantly, then pour egg mixture into saucepan, stirring constantly.
- Remove from heat, add vanilla extract and mix until smooth (may not take long at all)
- Pour into baked shell and smooth out the surface.

For the meringue:
- Whip the egg whites until stiff peaks form, adding the sugar a little at a time. The yolks should be shiny when finished
- Spread the meringue over the filling
- Bake 5-10 minutes or just until the meringue is golden brown on top
- Serve warm or cold