I am having an amazing afternoon snack of freshly baked Carrot Cake. I am thrilled by it.
When I was little, my mom almost always had an after school snack for us. Cookies or cake or popcorn or who knows what. To be honest, I mostly remember cookies. There may have been other things. It was so consistant that we would sometimes have other people drop in. They were boys, just older than my sister, and I kind of wonder if she was the one to make it sometimes to get them to come over...
In Morocco lunch is the main meal of the day, often around 1 or 2pm, and dinner might not be until 9 or 10. So there is a 'casse-croute' around 5 or 6pm a lot of times, because who can last 8 hours between meals?? Coffee or tea and bready treats with jam or butter or olive oil or honey. I need to learn how to make a bunch of those things, but that will take time. I have also been bemoaning the typical lack of oven, as you saw with the biscuits, and found a crazy idea to bake on a panini press. For whatever reason panini press-like electric grills are common, and one came in my furnished apartment, so I headed out today to buy ramekins!
I started with the brilliance of CCK's single serving cakes, since I know they work well, and had to adjust for availability of ingredients and 'baking' method. Luckily I found a bunch of spices at a store nearby, including whole nutmeg! Awesome. For all of you with access to a microwave, feel free to use the original recipe here. You can also find suggestions to decrease the calories and fat. For anyone else without an oven, or with a taste for odd methods, continue on.

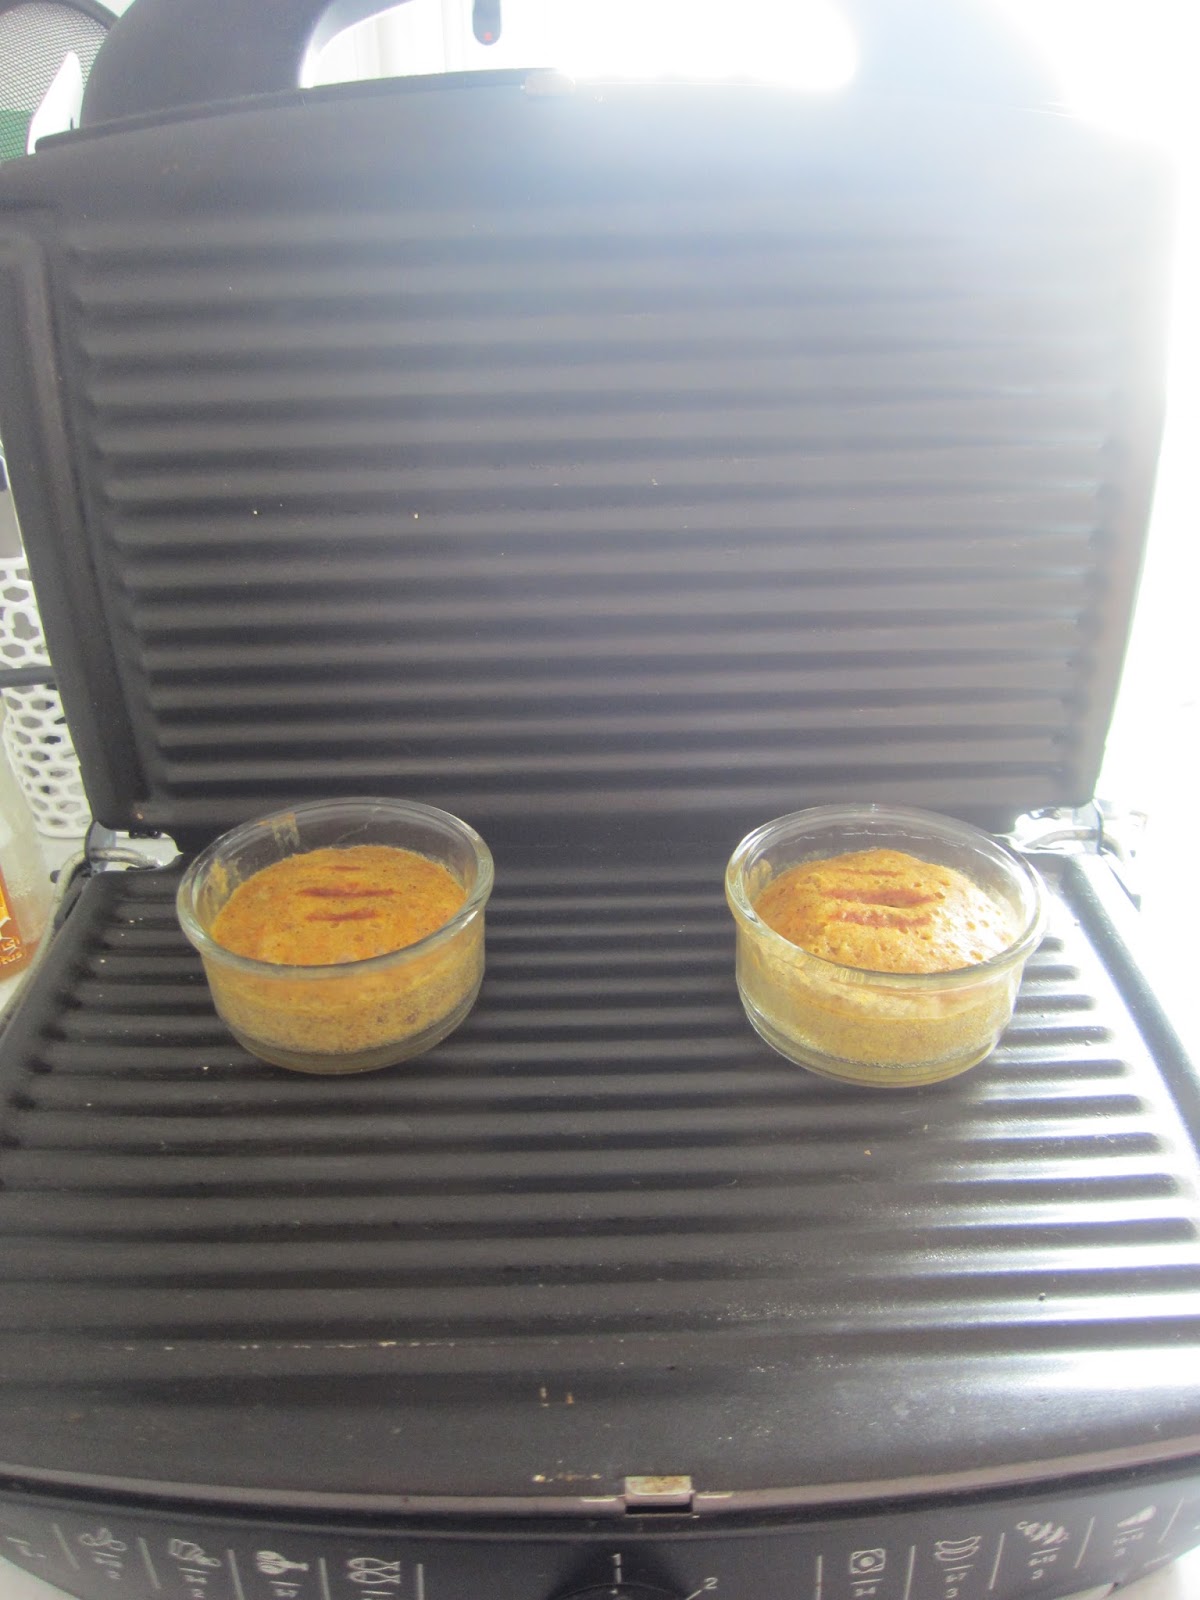
Carrot Cake, 'baked' in ramekins on a panini-press


Nutrition info: Cal: 227 Fat: 7.4g Protein: 5.7g Carbs: 35g (Also has 94% of your vitamin A needs!)
When I was little, my mom almost always had an after school snack for us. Cookies or cake or popcorn or who knows what. To be honest, I mostly remember cookies. There may have been other things. It was so consistant that we would sometimes have other people drop in. They were boys, just older than my sister, and I kind of wonder if she was the one to make it sometimes to get them to come over...
In Morocco lunch is the main meal of the day, often around 1 or 2pm, and dinner might not be until 9 or 10. So there is a 'casse-croute' around 5 or 6pm a lot of times, because who can last 8 hours between meals?? Coffee or tea and bready treats with jam or butter or olive oil or honey. I need to learn how to make a bunch of those things, but that will take time. I have also been bemoaning the typical lack of oven, as you saw with the biscuits, and found a crazy idea to bake on a panini press. For whatever reason panini press-like electric grills are common, and one came in my furnished apartment, so I headed out today to buy ramekins!
I started with the brilliance of CCK's single serving cakes, since I know they work well, and had to adjust for availability of ingredients and 'baking' method. Luckily I found a bunch of spices at a store nearby, including whole nutmeg! Awesome. For all of you with access to a microwave, feel free to use the original recipe here. You can also find suggestions to decrease the calories and fat. For anyone else without an oven, or with a taste for odd methods, continue on.

Carrot Cake, 'baked' in ramekins on a panini-press
Serves 2 (or 1 me)
1/3 cup flour (I happen to have cake flour, but at this amount I doubt it matters)
1/2 tsp cinnamon
1/8 tsp ginger
1/8 tsp fresh nutmeg
1/2 tsp baking powder
2 Tbs white sugar
1 tsp vanilla sugar (or use 1/4 tsp vanilla extract)
1 egg (original uses just half an egg's worth of replacer, so mine is certainly heavier, but I had no good way to keep half an egg!)
1/2 cup finely grated carrots,
2 Tbs milk
2 tsp oil (or more milk if you'd rather)
- In a small bowl, mix dry ingredients (not carrots).
- Mix carrots and wet ingredients in a separate bowl.
- Mix wet and dry ingredients and mix well.
- Pour into four greased ramekins (mine are 1/2 cup)


- If on press, 'bake' at just under 2 (or medium-low) for 10-15 minutes. Let the top of the press sit on the tops of the ramekins, which is why mine have the lovely grill marks on top. If using microwave, Katie says 1 minute, 20 seconds, or 350º for 15 minutes.

- Let cool a bit before wolfing down.

 |
| First attempt - heavier than the final recipe |
Nutrition info: Cal: 227 Fat: 7.4g Protein: 5.7g Carbs: 35g (Also has 94% of your vitamin A needs!)


