Showing posts with label splurge. Show all posts

Sunday, February 27, 2011

Daring Bakers February: Panna Cotta and Florentine Cookies

The February 2011 Daring Bakers’ challenge was hosted by Mallory from A Sofa in the Kitchen. She chose to challenge everyone to make Panna Cotta from a Giada De Laurentiis recipe and Nestle Florentine Cookies.

Well, it has finally happened. Something I never expected. Something I didn't even think possible. Something I would have never imagined as a possibility.

I found a dessert I don't like.

Not just, "oh, this could use X" or "Next time I'll do Y." No, it was a, "what did I just put into my mouth??" moment. I actually warned my first taster that I thought it went horribly wrong.... and was told it was perfect, exactly what it should taste like. Apparently, Panna Cotta is not my thing. Luckily, plenty of other people around thought it was wonderful and amazing, if rather rich, and it was all eaten. Just thinking about it again kinda makes my stomach turn.

HOWEVER, it is apparently a great recipe... if you go for that kind of thing! I've got an experimental non-dairy chocolate version in the fridge... it tastes delicious, so we'll see if it solidifies nicely! At the least it would be good frozen.

Traditional Panna Cotta - Recipe from Giada de Laurentis


Ingredients
1 cup (240 ml) whole milk
1 tablespoon (one packet) (15 ml) (7 gm) (¼ oz) unflavored powdered gelatin
3 cups (720 ml) whipping cream (30+% butterfat)
1/3 cup (80 ml) honey
1 tablespoon (15 ml) (15 gm) (½ oz) granulated sugar
pinch of salt

Directions:
1. Pour the milk into a bowl or pot and sprinkle gelatin evenly and thinly over the milk (make sure the bowl/pot is cold by placing the bowl/pot in the refrigerator for a few minutes before you start making the Panna Cotta). Let stand for 5 minutes to soften the gelatin.
2. Pour the milk into the saucepan/pot and place over medium heat on the stove. Heat this mixture until it is hot, but not boiling, about five minutes. (I whisk it a few times at this stage).
3. Next, add the cream, honey, sugar, and pinch of salt. Making sure the mixture doesn't boil, continue to heat and stir occasionally until the sugar and honey have dissolved 5-7 minutes.
4. Remove from heat, allow it to sit for a few minutes to cool slightly. Then pour into the glass or ramekin.
5. Refrigerate at least 6 hours or overnight. Add garnishes and serve.
The second recipe from this month was a cookie that reminds me of a Lacey - lots of butter, not many 'solid' ingredients. They were super quick and easy!

Nestle Florentine Cookies

Ingredients:
2/3 cup (160 ml) (150 gm) (5.3 oz) unsalted butter
2 cups (480 ml) (160 gm) (5 2/3 oz) quick oats
1 cup (240 ml) (230 gm) (8 oz) granulated sugar
2/3 cup (160 ml) (95 gm) (3⅓ oz) plain (all purpose) flour
1/4 cup (60 ml) dark corn syrup
1/4 cup (60 ml) whole milk
1 tsp (5 ml) vanilla extract
pinch of salt
1½ cups (360 ml) (250 gm) (9 oz) dark or milk chocolate

Directions:
- Preheat oven to moderately hot 375°F (190°C) (gas mark 5). Prepare your baking sheet with silpat or parchment paper.
- Melt butter in a medium saucepan, then remove from the heat.
- To the melted butter add oats, sugar, flour, corn syrup, milk, vanilla, and salt. Mix well. Drop a tablespoon full, three inches (75 mm) apart, onto your prepared baking sheet. Flatten slightly with the back of your tablespoon, or use a spatula.
- Bake in preheated oven for 6-8 minutes, until cookies are golden brown. Cool completely on the baking sheets.
I skipped the extra chocolate part [- While the cookies are cooling melt your chocolate until smooth either in the microwave (1 1/2 minutes), or stovetop (in a double boiler, or a bowl that fits atop a saucepan filled with a bit of water, being sure the water doesn't touch the bottom of the bowl).]
- Peel the cookies from the silpat or parchment and place face down on a wire rack set over a sheet of wax/parchment paper (to keep counters clean).
I skipped the extra chocolate part [- Spread a tablespoon of chocolate on the bottom/flat side of your cookie, sandwiching another (flat end) cookie atop the chocolate.]

Saturday, November 27, 2010

Daring Baker's Challenge November: Crostata

The 2010 November Daring Bakers’ challenge was hosted by Simona of briciole. She chose to challenge Daring Bakers’ to make pasta frolla for a crostata. She used her own experience as a source, as well as information from Pellegrino Artusi’s Science in the Kitchen and the Art of Eating Well.

When I saw this month's challenge, I was excited. A crostata is an Italian tart. I like tarts. I do tarts a lot. Well, when I can. And a new kind of tart sounded fun. It also sounded not-too-difficult which is great as I am desperately trying to finish everything I need for my degree by the deadline next Friday!

One of the directions of the challenge was to get creative with the tart filling. I love chocolate tarts, but that seemed just too easy. I automatically thought of the amazing black forest cake that someone made for my birthday and immediately decided that cherries would be the best way to liven up the chocolate tart.

So, tart cherries and chocolate were picked. But then what? Pastry cream or ganache? I got a little bit realistic here and realized a simple ganache would be much quicker. To make the chocolate flavor more intense, I called in my favorite secret ingredient: coffee. It would work great without the coffee, I'm sure, it just makes the chocolate more intense. Just a little in the cream really made a difference. I think it turned out great and my 3 taste-testers seem to agree.


It's not perfect, though, and the one glitch was completely avoidable. The crust recipe said to bake it for 20 minutes (with weights), then 5 without. Well, after that 25 minutes it looked a little soft and not very browned. And I left it in for about 10 more. Next time I'll take it out at 25; it tastes great, but it is just much too hard. I guess I should have realized that the different kind of crust is *similar* to what I usually make, but the person who wrote the recipe knew what she was doing.


The recipe for the crust is first, followed by my recipe for the filling. One thing to note is that I made this in a 10-inch springform pan and had a tiny bit of ganache left over - little enough that I could have added it on (instead of saving it to eat plain!) In a 9-inch tart pan, or in a pie pan, you may have more than you need.

Pasta Frolla (Crostata dough) recipe, straight from Simone:

Ingredients:

  • 1/2 c. minus 1 tablespoon [105 ml, 100 g, 3 ½ oz] superfine sugar or a scant 3/4 cup [180ml, 90g, 3 oz] of powdered sugar
  • 1 and 3/4 cup [420 ml, 235 g, 8 1/4 oz.] unbleached all-purpose flour
  • a pinch of salt
  • 1 stick [8 tablespoons / 4 oz. / 115 g] cold unsalted butter, cut into small pieces
  • grated zest of half a lemon
  • 1 large egg and 1 large egg yolk, lightly beaten in a small bowl
Making pasta frolla by hand:
  1. Whisk together sugar, flour and salt in a bowl.
  2. Rub or cut the butter into the flour until the mixture has the consistency of coarse crumbs. You can do this in the bowl or on your work surface, using your fingertips or an implement of choice.
  3. Make a well in the center of the mounded flour and butter mixture and pour the beaten eggs into it (reserve about a teaspoon of the egg mixture for glazing purposes later on – place in the refrigerator, covered, until ready to use).
  4. Add the lemon zest to your flour/butter/egg mixture.
  5. Use a fork to incorporate the liquid into the solid ingredients, and then use your fingertips.
  6. Knead lightly just until the dough comes together into a ball.
  7. Shape the dough into a flat disk and wrap in plastic wrap. Place the dough in the refrigerator and chill for at least two hours. You can refrigerate the dough overnight.
  8. [Added by Beki, based on Simone's directions] To blind-bake the shell (bake it empty), preheat oven to 350.
  9. Roll out 1/8th-1/4th inch thick on a piece of plastic wrap. Carefully move to the pan, plastic wrap side up, press into edges, and remove plastic wrap.
  10. Poke with a fork in several places and place a piece of aluminum foil or parchment paper over the bottom of the crust. If you have dry beans or pie weights, put them on top (I didn't use any, it was fine. Just poke it with a fork a lot so it doesn't bubble up.)
  11. Bake at 350 for 20 minutes. Remove weights and foil/parchment. Bake 5 more minutes and remove. Let cool completely.


Making pasta frolla with a food processor:

  1. Put sugar, flour, salt, and lemon zest in the food processor and pulse a few times to mix.
  2. Add butter and pulse a few times, until the mixture has the consistency of coarse meal.
  3. Empty food processor's bowl onto your work surface
  4. See step 3 above and continue as explained in the following steps (minus the lemon zest, which you have already added).
Cherry Chocolate filling

Ingredients:
1 can tart cherries in water
1/4 cup granulated sugar
8 oz chopped chocolate (I used good-quality chocolate chips that are 63% cacao)
1 cup heavy cream
2 tsps ground coffee (if you don't want to strain it (see step 4) you can use instant, but it may not be as good)

1. Drain cherries in a colander (I recommend over a dish, the juices are very tasty!)
2. Put chocolate into a small mixing bowl. Line a mesh sieve with 4 layers of cheesecloth and place over bowl of chocolate.
3. Heat heavy cream in a small saucepan over medium, stirring occasionally, until it boils.
4. When cream boils, add ground coffee. Cook, stirring constantly, 2 minutes. Pour through sieve into chocolate to remove all the grounds.
5. Stir chocolate and cream until chocolate melts and is completely incorporated.
6. Toss cherries with the sugar (in the colander works fine.) Spread cherries out in cooled tart shell.
7. Spread ganache over sugared cherries, encouraging it down between them. Allow to set at room temperature or refrigerate for 20-30 minutes and remove from fridge. You can store it at room temperature. If you refrigerate it, let it come to room temperature for (preferably) 2 hours before serving.

Wednesday, October 27, 2010

Daring Baker's Challenge - Pumpkin donuts!

The October 2010 Daring Bakers challenge was hosted by Lori of Butter Me Up. Lori chose to challenge DBers to make doughnuts. She used several sources for her recipes including Alton Brown, Nancy Silverton, Kate Neumann and Epicurious.

We had a choice of donut kinds: pumpkin, bamboloni (which is what they call them in Tunisia, I guess it's from Italy), or raised. Apparently the raised ones bake pretty well, so I was gonna do them if I had time. Then I realized that I don't have time.

I did force myself to take a break, though, to make one kind. And pumpkin it was! I thought it sounded delicious. I prefer cake donuts for the most part, and of course these were. I was surprised at how easy they were to make. The prep didn't take too long, but frying them up definitely did. I was happy to have a reason to use the candy thermometer that my mom sent me :) Mine didn't hang around long enough to get glazed, but there is glaze in the recipe below.

And now for the beautiful pictures. Of the whole process for once. Rolled out dough, half-cut out, in the oil. Draining on paper towels. Broken open on a pile of whole ones to see the gorgeous inside and out. And then stacked up on a plate before everyone came by and gobbled them down. So lovely and wonderful. Taken on my friend's good camera, because mine is quite crappy and I still haven't replaced it. My friend who, for once, decided to delete a bunch of his pictures.... and accidentally got rid of mine at the same time. Heart broken. You have no idea.

There is one minor redeeming fact. A girl here is taking a picture of every thing she eats for a year. And happened to get one of the pumpkin donut holes. Here it is. The sole lonely surviving picture.


Pumpkin Doughnuts:

Preparation time:
Hands on pre-chill prep time - 15 minutes
Chilling time - 3 hours
After-chilling prep time - 15 minutes
Cooking time - 30+ minutes (Depends on the size of your pan)

Yield: About 24 doughnuts & 24 doughnut holes

Ingredients
All Purpose Flour 3.5 cup / 840 ml / 490 gm / 17 ¼ oz
Baking Powder 4 teaspoon / 20 ml / 24 gm / .85 oz
Table Salt 1 teaspoon / 5 ml / 6 gm / .2 oz
Cinnamon, ground 1 teaspoon / 5 ml / 6 gm / .2 oz
Ginger, ground ½ teaspoon / 2.5 ml / 3 gm / .1 oz
Baking Soda ½ teaspoon / 2.5 ml / 3 gm / .1 oz
Nutmeg, ground ¼ teaspoon / 1.25 ml / 1.5 gm / .05 oz
Cloves, ground 1/8 teaspoon / .6 ml / ¾ gm / .025 oz
White Granulated Sugar 1 cup / 240 ml / 225 gm / 8 oz
Butter, Unsalted 3 Tablespoon / 45 ml / 42 gm / 1.5 oz
Egg, Large 1
Egg Yolk, Large 2
Pure Vanilla Extract 1 teaspoon / 5 ml
Buttermilk ½ cup + 1 Tablespoon / 135 ml /
Pumpkin 1 cup / 240 ml / 285 gm / 10 oz (Canned pure pumpkin or fresh cooked and pureed pumpkin – DON’T use pumpkin pie mix!)
Canola Oil DEPENDS on size of vessel you are frying in – you want THREE (3) inches of oil (can substitute any flavorless oil used for frying)

Powdered Sugar Glaze:

Powdered (Icing) Sugar 2 cup / 480 ml / 250 gm / 9 oz
Whipping Cream (About 32% butter fat) 4 Tablespoon + more if needed / 60 ml

Directions:

  1. Whisk together the first 8 ingredients in medium bowl to blend. Using electric mixer, beat sugar and butter in large bowl until blended (the mixture will be grainy and not smooth). Beat in egg, then yolks and vanilla. Gradually beat in buttermilk; beat in pumpkin. Using rubber spatula, fold in dry ingredients in 4 additions, blending gently after each addition. Cover with plastic; chill 3 hours.
  2. Sprinkle 2 rimmed baking sheets lightly with flour. Press out 1/3 of dough on floured surface to 1/2- to 2/3-inch (12 mm to 15 mm) thickness. Using 2 1/2-inch (65 mm) -diameter round cutter, cut out dough rounds. Arrange on sheets. Repeat with remaining dough in 2 more batches. Gather dough scraps. Press out dough and cut out more dough rounds until all dough is used.
  3. Using 1-inch (25 mm) diameter round cutter, cut out center of each dough round to make doughnuts and doughnut holes.
  4. Line 2 baking sheets with several layers of paper towels. Pour oil into large deep skillet to depth of 1 1/2 inches (40 mm). Attach deep-fry thermometer and heat oil to 365°F to 370°F (185°C to 188°C). Fry doughnut holes in 2 batches until golden brown, turning occasionally, about 2 minutes. Using slotted spoon, transfer to paper towels to drain. Fry doughnuts, 3 or 4 at a time, until golden brown, adjusting heat to maintain temperature, about 1 minute per side. Using slotted spoon, transfer doughnuts to paper towels to drain. Cool completely.


Glaze Directions:

  1. Whisk powdered sugar and 4 tablespoons whipping cream to blend. Whisk in additional cream, 1 teaspoon at a time, to form medium thick glaze.
  2. Can be made up to 3 hours ahead.
  3. Add doughnut holes to bowl of spiced sugar and toss to coat.
  4. Spread doughnuts on 1 side with powdered sugar glaze.
  5. Arrange doughnuts, glazed side up, on racks. Let stand until glaze sets, at least 30 minutes.

Tuesday, September 28, 2010

Daring Bakers September: Decorated Sugar Cookies


The September 2010 Daring Bakers’ challenge was hosted by Mandy of “What the Fruitcake?!” Mandy challenged everyone to make Decorated Sugar Cookies based on recipes from Peggy Porschen and The Joy of Baking.

While most people will think of sugar cookies as no kind of challenge, my sisters will laugh and tell you what disasters I've done with them in the past. I don't know why they were so difficult! The worst attempt is when I was going for purple and green (forget why - maybe spring?) and ended up with this grayish purple and green substance the consistency of toothpaste. Yuck. Luckily, this recipe was quite straight-forward and a few self-proclaimed sugar cookie haters enjoyed it.

The cookies were to be decorated with royal icing in ways that remind you of fall. I had never made it before, but the recipe is really simple. I mixed it up, went to get the food coloring, and -- the food coloring, where did it go??? I still don't know. So it became an EXTRA challenge: decorate cookies creatively all in white. I enlisted a few friends. Working at the table in the dining room, I found out that many people wanted to help! After I finish my finals, I think it would be a fun finals-break activity (yes, that's 10 weeks away.) You can find the full directions here.

Below is my favorite that I decorated, but there are plenty more! I thought I had taken pictures of every single one, but they're not all here!!!!!! :( I'm heart broken. I've been doodling this star on the sides of my class notes since high school. Fall = more classes = more notes = more stars.

This one is cookie monster. Someone said "we should do one that's cookie monster" T, from Vietnam, says, "Ok, I'll do it!" So I ask him, "T, do you know what cookie monster looks like?" And his response was something like "oh, it's a thing?" so he got someone with a laptop in the room to look it up for him. This was the result. I added the cookie crumbs on his face.

This is a running dog (tilt your head right). Courtesy of B, in picture below.

K, from Korea, made this one. I like it!

Made by K who ended up decorating more than anyone else! It's the name of where we live.

The portrait of B (on the cookie, B is on the left), made by R (holding the cookie.)

K's family, labeled and all.

And S's city. Even boys got in on the fun :)

Thursday, September 23, 2010

Saturday Splurge idea

Tonight at the house we made Take 5 candy bars. If you've never tried them, you probably shouldn't. They are horribly addictive, I'm sure. People were excited at the thought of making a good candy bar. We talked about other things, too, and one of the topics was marshmallows. If I ever sell baked goods, one of the things will be homemade s'mores. Homemade graham crackers, high quality chocolate (fair trade would be a nice touch!) and marshmallows. I love Cooking for Engineers, and he has good info on marshmallows with a nice recipe, too. Before I open a bakery, I'll have to find a good corn syrup source that doesn't add the high-fructose variety. A vegetarian (ie no gelatin) version could be worth a search, too.

Friday, August 27, 2010

Daring Bakers' August Challenge - Ice Cream Petit Fours

The August 2010 Daring Bakers’ challenge was hosted by Elissa of 17 and Baking. For the first time, The Daring Bakers partnered with Sugar High Fridays for a co-event and Elissa was the gracious hostess of both. Using the theme of beurre noisette, or browned butter, Elissa chose to challenge Daring Bakers to make a pound cake to be used in either a Baked Alaska or Ice Cream Petit Fours. The sources for Elissa’s challenge were Gourmet magazine and David Lebovitz’s “The Perfect Scoop”.

(Written while cake is baking:) First, I would like to rave about beurre noisette. Browned butter. Whatever you want to call it. I wasn't sure how this would work, and was a little cautious making it. But ohhhhh my. Noisette means hazelnut in French, and it's called that because the butter turns brown and gets a delicious nutty flavor. Like a kind of unbelievable one. And oh-so-awesome. Just the batter for the cake is wonderful, I can't wait to see how it is cooked! And with the ice cream I picked... excited!

Which ice cream, then? The amazing delicious lemon ginger one that I used last month! It was so tasty, but I only got one spoonful of it and I didn't find the time to make it again. I was so excited when I realized I could do it for this month's challenge. I *do* have the recipe for you this time, unlike last month when I totally lied and never posted it. (Sorry.) I decided to try to be a little healthier and used half and half instead of heavy cream. I'll let you know if that turns out to be an ok thing.
Ok, it has all been made (and eaten!) now. The icecream was still really good, but I think that if you decrease the fat like that you *really* need to make it in an icecream maker. It was more icey than creamy. Which made it hard to bite with the cake. The cake itself was really good, as expected. I will definitely make it again! I decided for the ganache to use a cooking light recipe that I have made before to go on a (peanut butter chocolate) cake, which was delicious. Unfortunately, it was a little thick, so while it's still pretty, it's not quite as pretty as I wanted. I'll quit talking now and let you see the prettiness:


The Ginger Lemon Ice Cream recipe is one I tinkered with, while the others are straight from their original sources. Enjoy!

Ginger Lemon Ice Cream

Yields about 1 quart

2/3 cup thinly sliced fresh ginger
2 cups heavy cream (or half & half, if you like)
1 1/2 cups whole milk
3/4 cup granulated sugar
Pinch of salt
Zest of 2 Lemons
5 large egg yolks

INSTRUCTIONS
Cut the ginger into thin slices. In a saucepan, place the ginger slices and add just enough water to cover. Bring the water to boil and blanch the ginger for two minutes. Drain. Save the ginger and discard the liquid. (This is important! Ginger has the lemon-like ability to curdle milk if not blanched.)

In a separate bowl, combine the finely grated lemon zest, sugar and milk. If you have a clean processor, throw the sugar and lemon zest into it. Mix with milk thoroughly until the sugar dissolves.

Place the reserved ginger back into the saucepan. Add the milk mixture, half a cup of cream and salt. Warm the mixture. Once warm, remove from the heat. Cover and steep for at least an hour or up to a whole day. I did overnight.

In a separate bowl, whisk the egg yolks.

Rewarm the ginger mixture. Remove the ginger slices with a slotted spoon. Dispose of the ginger. Slowly pour the warmed mixture in the egg yolks and continue to whisk.

Once combined, return the egg-ginger mixture to the saucepan. Over medium heat, stir the mixture constantly with a wooden spoon until it thickens and coats the spoon. Strain the mixture into a bowl and combine with the remaining cream.

Immediately chill the mixture in the freezer. Once thoroughly cooled, freeze it in your ice cream maker, according to the manufacturer’s instructions.

Get the other recipes by clicking below.

Wednesday, July 28, 2010

Daring Bakers' July Challenge - Swiss Swirl Ice Cream Cake

Yikes, I went through all the trouble of making this, and then forgot to post it on time! NOOO! Well, I'm only a day late, I'll have to hope that will do.

The July 2010 Daring Bakers’ challenge was hosted by Sunita of Sunita’s world – life and food. Sunita challenged everyone to make an ice-cream filled Swiss roll that’s then used to make a bombe with hot fudge. Her recipe is based on an ice cream cake recipe from Taste of Home.

My freezer was having issues getting cold enough, so my cake was pretty soft. I decided to keep the chocolate cake with whipped cream inside, but added just a touch of cilantro to the cream. For my two kinds of ice cream, I went with ginger-lemon and coconut (I'll post the recipes soon for you.) The Ginger-Lemon is now officially my favorite and was AMAZING. The coconut was coconut. So, good, but not anything to drool about. I may pretend I have time to make the ginger-lemon one again this weekend. So tasty.

First, a picture of the separate parts, to get you started:

And then, the beautiful cake:


I served it outside, so while I had hoped to get a pretty pick of the layers, it was hot out and started melting really quickly (in addition to the freezer problem) so by the time I had cut a few pieces, it was no longer pretty. At all. Oh, plus it was 11pm, so the lighting was bad. See, I tried to take a pic outside before we got smart and moved it to the hallway:

Tuesday, May 18, 2010

S--er, Tuesday Splurge: Ginger Syrup and Candied Ginger

These go together because one is the result of the other. Unless you set out to make them both intentionally, which is even better! This 'recipe' takes a decent bit of time, but not a lot of attention. I think it's a cool use for left-over ginger, though you could also peel it, wrap it up and keep it in the freezer (thanks, Karen!)

I can't remember where I got the idea, so I apologize to whichever foodblogger put this into my head :) It's less of a recipe and more of guidelines. I'm actually not quite sure what I'm going to do with it. I may try to throw the ginger in the processor and sprinkle it over gingerbread the next time I make it. The ginger syrup has only been used in a rhubarb compote I made today. (Which I ate with plain yogurt and granola - YUMM!) I'm gonna try to make ginger ale with club soda. I think it would be good with any fruit, drink, icecream, or yogurt. I used the photo from this person because it looks a decent bit like mine. Will take a photo when I remember, but I wanted to get this up.


Candied Ginger and Ginger Syrup
Serves: Depends on what you use it for! Time: An hour or so

Ginger
1 1/2 cups sugar
1/2 cup water

1. Peel your ginger and then slice very thinly. This will make it take less time for the pieces to give their juice to the syrup and suck up sugar themselves.

2. Put about sugar and water into a small sauce pan with the sliced ginger. Turn on to low. Stir gently until sugar dissolves and let it simmer for at least 30 minutes. Add more sugar and water if your ginger is not covered. You will want to add more water if the bubbles while it boils look really big. That's a sign that it's a lot of sugar and will be solid when you pour it out, not syrup.

3. When you're tired of waiting for them to boil, take them out and put them on a wire rack to drain and dry.

4. After it cools for a bit, pour the syrup into a container to keep in the fridge.

Saturday, April 10, 2010

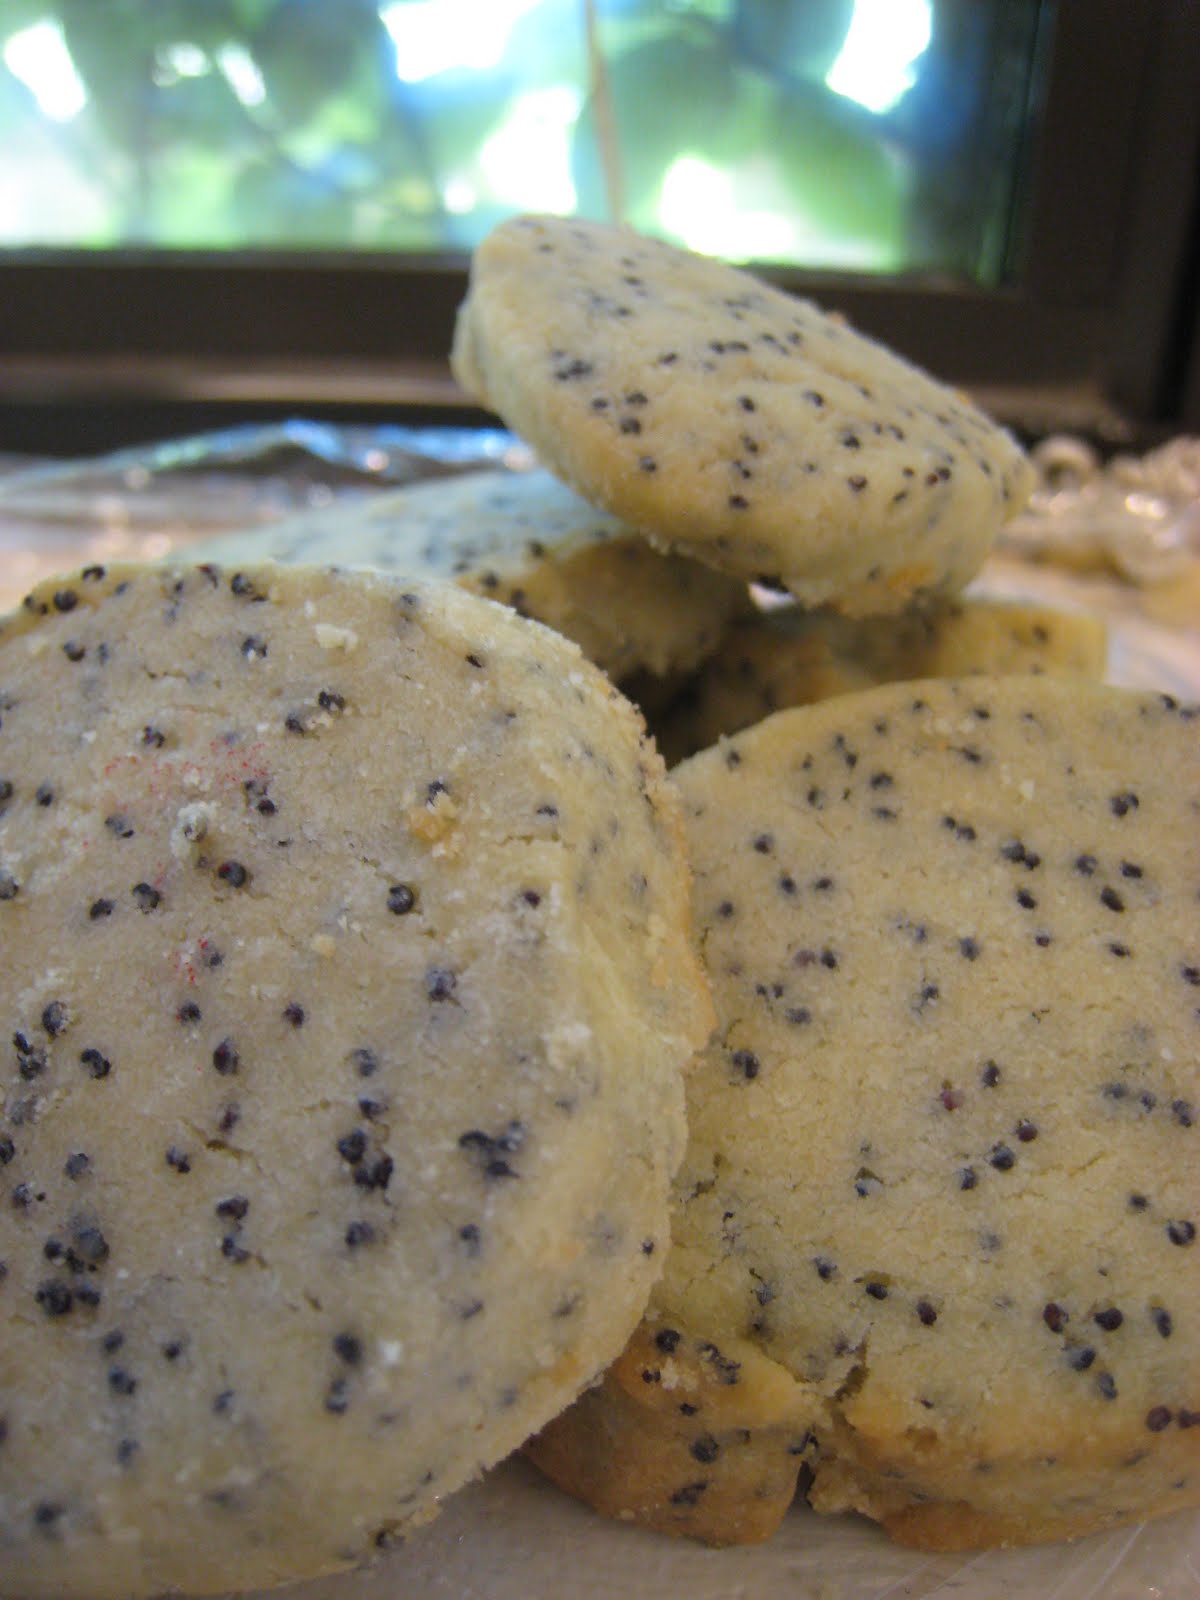
Saturday Splurge: Almond Poppyseed Cookies

This is another great slice & bake recipe. I have been busier with classes (like running around crazy, not getting enough sleep and HOPING that I am keeping my work straight) and so treats that take less time have definitely been needed. Last week I made these. I was worried that they might be a little bit too unusual and not sweet enough for some, but they got a great response!

If you are looking for the original recipe, and her suggested additions, go here. I will certainly be trying more of them later, but here is the version I made, and my picture to go with. I was really excited to make these because there is a large container of poppy seeds in the kitchen that had just been begging me to find a use for it. I had to oblige, of course!

Almond Poppy seed Cookies
Makes: 50-60 cookies

2 sticks (8 ounces; 230 grams) unsalted butter, at room temperature
2/3 cup confectioners’ sugar, sifted
2 large egg yolks, at room temperature
Pinch of salt
1 teaspoon almond extract
2 cups (280 grams) all-purpose flour
1/4 cup poppyseeds

1. Put the butter in the bowl of a mixer fitted with the paddle attachment and beat at medium speed until smooth. Add the sifted confectioners’ sugar and beat again until the mixture is smooth and silky. Beat in the egg yolks, followed by the salt and any dried fruits, zest, nuts or seeds. Reduce the mixer speed to low and add the flour, beating just until it disappears. It is better to underbeat than overbeat at this point; if the flour isn’t fully incorporated, that’s okay just blend in whatever remaining flour needs blending with a rubber spatula.

2. Tear off a piece of plastic wrap about 18 inches long. Turn half the dough out onto the plastic wrap and (with clean hands!) shape it carefully into a log. Once shaped, roll up in wrap, repeat with other half, and refrigerate for 2 hours to 3 days. If you want to make sure they're perfectly round, re-roll after 30 minutes.

3. Position the racks to divide the oven into thirds and preheat the oven to 350°F (180°C). Line two baking sheets with parchment paper [or not - I didn't and only one out of 150 broke!]

4. While the oven is preheating, using a sharp slender knife, slice each log into cookies about 1/4 inch (10 mm) thick. (You can make the cookies thicker if you’d like; just bake them longer.) Place the cookies on the lined baking sheets, leaving about 1/2 inch (1.5 cm) space between them.

5. Bake the cookies for 12 to 14 minutes, or until they are set but not browned. Transfer the cookies to cooling racks to cool to room temperature.

Do ahead: Packed airtight, the cookies will keep for about 5 days at room temperature, or in the freezer for a month. Unbaked logs can be kept refrigerated for up to 3 days or stored in the freezer for up to 1 month.

Saturday, April 3, 2010

Saturday (time) splurge: Apple chips!

When I made kale chips a couple of weeks ago, there were some fans and some... disgusted faces. Dark, leafy greens aren't for everybody. One girl asked, "I wonder if you could do that with apples?" I didn't think it would work in a regular oven, and told her so. Then I went upstairs to my room to find out. Turns out that you can!

A quick search tells me I've only used the word here once, but I should confess: I am terribly impatient when it comes to food. That was a good bit of my motivation starting this blog - find food that doesn't take so long and then write it down somewhere so I wouldn't forget. For this reason, many of the apple chip recipes looked like they took WAY too long for me. When I say many, I mean all that looked viable. It was sad.

So I said, too bad, I'll try it my way anyway! Please note that a key element in this is that my building has a convection oven, which is great at drying things out. Terrible when you're baking chicken or salmon, but great for the chip adventure. I set the oven to 300, thinly sliced my apple, tossed it in cinnamon and sugar, put it in the oven and set it for 20 minutes, expecting to turn the pan then. I went back to my reading.

Was I ever surprised when, at 20 minutes, they all looked close to done. I took one out, shook it like a polaroid til it cooled, and bit into a nice, crispy chip! I was thrilled and pulled the whole sheet out! So, the convection oven gets a major thumbs-up from me on that point. I think they were too dark, though none of my testers thought they tasted burnt, so next time I'll try 275. I *really* wish I had a mandoline or disk for a food processor that slices super thin, because then these would take 5 minutes before the oven, and that would be amazing in my book. For a regular oven recipe, I am copying one (originally from here) for your convenience.

Baked Apple Chips
Serves: 2-3 Time: 1:45 to 2:15

2 apples
approx. 2 tbsp cinnamon
optional: 1 Tbs brown or white sugar
parchment paper (or silpat)
baking/cookie sheet

- Pre heat your oven to 200 degrees F. (LOW SETTING!)
- Line the baking sheet with parchment paper.
- To prepare the apples:
- Holding the apple steady skin side on the cutting board, with a steady hand and a sharp knife, slice the apples into thin uniform slices. This will be easier if you cut the apple in half first. You want them to be thin, but not TOO thin. You also want them to be as even as possible so that they dry out evenly. Baking the core makes it edible, so remove only if you want to.
- Place the slices in one layer on the prepared baking sheet.
- Sprinkle with a layer of cinnamon, and if using sugar this is when you sprinkle it on too.
- Place on the middle rack in the oven, and keep the door slightly open by placing a wooden spoon in the top corner of the door. This needs to be done so that a vent is provided for the moisture from the apples, otherwise the apples won’t dry out properly and you will be left with a mushy and somewhat mouldy mess of apple slices.
- The total baking time will be between 1 1/2 hours and 2 hours, depending on the thickness of the apple slices. Check the apple slices at 1 hour to ensure they are not burnt. Check the apple slices again at 1 1/2 hours. (To do this, remove one slice from the oven, and place on a plate. Allow to sit for about 3 minutes, then eat it. If it is crispy, then you’re good to remove them! If it’s still a bit soft, keep the apples in for another ten minutes.) With the slices I baked, at 1 hour and 20 minutes they were almost done. I checked again every 5 minutes, and at 1 hour and 40 minutes they were completely finished.

Note: even when they are finished baking, when immediately removed from the oven, they will still be slightly soft. This is why to test them, you need to allow one slice to cool at room temperature for 3 minutes before testing it.

Remove from the oven, and allow to cool for about 3 minutes on the parchment paper. Then, remove them from the paper and place on a plate to serve.

For storage, simply place them in an airtight container and store at room temperature until ready to eat.

Saturday, March 27, 2010

Saturday Splurge: Daring Bakers' Challenge: Orange Tian

For a while I have been thinking about joining an online cooking or baking group. However, many of them have weekly things to make, and I just can't commit to that right now. And then I found the Daring Kitchen. Their challenges are just one per month. And it's not just any old thing, it's a challenge. After the first one, I'll agree that it is at least making me do new things! Here it is:

The 2010 March Daring Baker's challenge was hosted by Jennifer of Chocolate Shavings. She chose Orange Tian as the challenge for this month, a dessert based on a recipe from Alain Ducasse's Cooking School in Paris.

None of the recipe is *tooo* complicated. It just has a lot of steps. Did you know you can caramelize sugar without adding any liquid? I didn't! Or that you marmalade contains the whole orange? Not me, clearly. Or what segmenting an orange means? All new, fun things. Lucky you - I figured out how to do a jump in my blog! So the full recipe, the four pages of it!, is posted if you'd like. Just click the link after the picture.


Keep reading if you want the full recipe

Saturday, March 6, 2010

Saturday Splurge: Slice & Bake Shortbread Cookies

We finally got powdered sugar again and I wanted to celebrate by making shortbread cookies. Ok, actually, I had been wanting to do shortbread for two weeks, but we had been out. My only concern was the time. I get one hour of labor credit for making stuff on Saturdays. I usually take longer, and don't mind, but rolling, cutting, re-chilling and baking shortbread for 100 people sounded a bit too tedious all the same. I knew there HAD to be a better way.

For years my family has made our own slice & bake cookies. As in, you make a triple batch, roll part of it up in plastic wrap, throw it in the freezer, and - POOF! - excellent cookies whenever you want. Since shortbread cookies have to chill anyway (which is part of what makes rolling them a pain - it needs to be all cold for them to keep their shape, but then you need serious muscle to get the dough flat, and by the time you get them cut out, they're warm again and need to chill again) I thought why not put them in logs and just cut them in circles? Less fun? Maybe. But way faster. I made a quick search of the interwebs, just to make sure it wouldn't kill anything, and what I found indicated to me that they should work out just fine.


I would be aware of a couple things here. First, if you want them to be nice circles, you will have to pay some attention to the dough as it chills. It's super soft when warm, so even after I put them in nice rolls, it got flat on one side while in the fridge. re-rolling every 30 minutes would probably work and not increase the chill time too much. The second thing is that you do need to pay attention to thickness to get them to cook properly. And don't try to dip them in cocoa before baking. I did it to some - that's the brown traces in the picture above, but they didn't taste ANY different. Not worth the time. When chilling, be sure there's no fish or other strong smell in the fridge, because the butter will pick it up like it's its baby. This is a standard recipe, so I give credit to anyone and everyone.

Slice & Bake Shortbread Cookies
Makes: about 30 cookies from a 2-inch round log Time: A whole lot less than rolling & cutting them!

1 1/2 cups flour
1/2 cup corn starch (for sturdier cookies, use 2 cups flour, omit cornstarch)
1/4 tsp salt
1 cup (2 sticks) UNSALTED butter, room temperature (as the butter flavor really comes through, this is more important. I had to use salted and it was ok, but be sure to leave out the salt above.)
1/2 cup powdered sugar
1 tsp vanilla extract

- Cream the butter until smooth
- Add the sugar, cream until smooth
- Beat in the vanilla extract
- Mix flour and cornstarch in a small bowl, then mix into butter mixture until just incorporated
- Scoop dough onto a long piece of plastic wrap, (or several, if you want to have it on hand for small batches) making a line of dough near one edge. Be sure to leave room at the ends.
- Fold near edge of wrap over dough, and roll up dough, closing ends
- Chill in fridge at least 2 hours, up to 1 day (or freeze, well-wrapped, for maybe a month)
- When chilled, preheat oven to 350º
- When oven almost hot, remove dough from fridge/freezer, slice into 1/4 inch cookies and place on ungreased cookie sheet
- Bake 8-10 minutes or until lightly browned.

Saturday, February 27, 2010

Saturday Splurge: Graham Crackers

If you couldn't tell, I have gotten into reading other food blogs. I think it takes the place of food network. Now that I don't have tv, my recipe and cooking and baking tips are from other 'real' people. I like that. And my time isn't getting spent on tv, so it's like this totally takes the place. One food blog that I am particularly impressed by I've mentioned a bunch of times, but this recipe was found on hers again.

I love chocolate covered graham crackers. When I was an undergrad, the campus convenience store carried a brand of them, round bite-size ones, that I would get allll the time. We got to use our meal cards there, so it was like any other food. It was fantastic. Well, the brand either quit making them, or they are just hard to find. I have looked many, many places. Other people make them, too, but the ones in the grocery store aren't that great. I love the Brown & Haley ones, but I am not a walk away from the little pink house anymore. And even the real brand graham crackers with melted chocolate on top just aren't the same.

So, I decided I would find a graham cracker recipe and put chocolate on it. I figured it might take a bit of a search. I knew Alton had one, but wanted to see if others did, too. And then I ran across SK's graham cracker recipe, entirely by accident. Wonderful with chocolate, thank you! I had some of my testers taste them without telling them what they were. Two people said "graham crackers!" right off, but several others couldn't place it. When I told one, she said "I was thinking that, but this is much too delicious to be a graham cracker." I'll take that.

I should point out to my non-US readers that these are not really crackers. They are a thin, crispy cookies. And soooo good. If you try them while still warm, they are not at all crispy. I did this at first and was very disappointed. Until my second cracker, 5 minutes later, crunched perfectly in my mouth.


Graham Crackers
The topping amount will make a heavy coating, like the store-bought ones. Make only half if you just want a light-to-moderate sprinkling.

Makes 10 4 x 4.5-inch graham crackers or 48 2-inch squares

2 1/2 cups plus 2 tablespoons (375 grams) unbleached all-purpose flour (a swap of 1/2 cup with whole wheat flour or 1 cup whole wheat pastry flour works well here, too)
1 cup (176 grams) dark brown sugar, lightly packed
1 teaspoon (6 grams) baking soda
3/4 teaspoon kosher or coarse sea salt (4 grams)
7 tablespoons (3 1/2 ounces or 100 grams) unsalted butter, cut into 1-inch cubes and frozen
1/3 cup (114 grams) mild-flavored honey, such as clover
5 tablespoons (77 grams) milk, full-fat is best
2 tablespoons (27 grams) pure vanilla extract

Topping (optional)
3 tablespoons (43 grams) granulated sugar
1 teaspoon (5 grams) ground cinnamon

Make the dough: Combine the flour, brown sugar, baking soda, and salt in the bowl of a food processor fitted with the steel blade or in the bowl of an electric mixer fitted with the paddle attachment. Pulse or mix on low to incorporate. Add the butter and pulse on and off on and off, or mix on low, until the mixture is the consistency of a coarse meal.

[Alternately, if you don't have a food processor or electric mixer, you can cut the ingredients together with a pastry blender. Just make sure they're very well incorporated.]

In a small bowl, whisk together the honey, milk, and vanilla extract. Add to the flour mixture and pulse on and off a few times or mix on low until the dough barely comes together. It will be very soft and sticky. Lay out a large piece of plastic wrap and dust it lightly with flour, then turn the dough out onto it and pat it into a rectangle about 1-inch thick. Wrap it, then chill it until firm, about 2 hours or overnight. Meanwhile, prepare the topping, if using, by combining the sugar and cinnamon in a small bowl and setting aside.

Roll out the crackers: Divide the dough in half and return one half to the refrigerator. Sift an even layer of flour onto the work surface and roll the dough into a long rectangle about 1/8 inch thick. The dough will be sticky, so flour as necessary. Trim the edges of the rectangle to 4 inches wide. Working with the shorter side of the rectangle parallel to the work surface, cut the strip every 4 1/2 inches to make 4 crackers. [This makes a traditional graham cracker shape. Any shape will work.]

Place the crackers on one or two parchment-lined baking sheets and sprinkle with the topping. Chill until firm, about 30 to 45 minutes in the fridge or 15 to 20 minutes in the freezer. Repeat with the second batch of dough. Finally, gather any scraps together into a ball, chill until firm, and re-roll.

Adjust the oven rack to the upper and lower positions and preheat the oven to 350°F.

Decorate the crackers: Mark a vertical line down the middle of each cracker, being careful not to cut through the dough (again, this is for the traditional cracker shape). Using a toothpick or skewer (SK uses the blunt end of a wooden skewer for more dramatic dots), prick the dough to form two dotted rows about 1/2 inch for each side of the dividing line.

Bake for 15 to 25 minutes, until browned and slightly firm to the touch, rotating the sheets halfway through to ensure even baking. [The baking time range is long because the original recipe calls for 25 minutes SK's oven took 15, the convection oven here took about 10.]

Saturday, February 20, 2010

Saturday Splurge: Beyond Cocoa Brownies

Brownies. Growing up, like so many people, brownies were a common thing in my house. The Betty Crocker page was smudged with cocoa and butter and who-knows-what-else that missed the bowl (or got thrown out when lifting the stand mixer top - oops!) One thing that always seemed sad about brownies was that we basically never had baking chocolate. I'm not exactly sure why. My mom kept loads of baking supplies around. For a while, I made chocolate chip cookies every Sunday (and would take some to friends). Valinda made potato donuts once a week for maybe 6 months. (mmmm.... homemade donuts!) Our brownies, however, were constantly cocoa brownies. And it was sad. Because every time I made them, I put in the butter flavored shortening (in the days before we knew about evil trans fats) and the cocoa and wondered how they'd be with chocolate.

Since then, I have indeed made brownies with chocolate. They can be insanely good and rich. I also have realized the joys of the quick box of brownie mix. Plus it's so versatile. In my building, we do get cocoa now and then. But baking chocolate? Nope, not gonna happen. I had decided I wasn't going to make brownies. Other people were welcome to, but I didn't want to give in and have the lame attempt that just was never quite right. Until I read this post. With this recipe.

Wait..... cocoa can be an INTENTIONAL brownie ingredient?? How did I never know?? Why did I go so many years without this knowledge?? And so, Hershey's in hand, I went for it. And am I (and the 40 other people who had some) ever happy that I did. I actually had trouble convincing people they didn't have any melted chocolate, just cocoa. I call that true success. The recipe has my description, with extra comments in [brackets]. I made a quadruple batch and it even worked just fine. Impressive. And so pretty! I am sure they'd be perfect with crème anglaise, but remembered that I am, in fact, a student and studying won out over testing the theory. Another day. For sure.

Best Cocoa Brownies
Adapted from Alice Mendrich’s Bittersweet
Makes 16 larger or 25 smaller brownies [I cut it into the smaller ones, and everyone I heard from said that it was the perfect size.]
10 tablespoons (1 1/4 sticks, 5 ounces or 141 grams) unsalted butter
1 1/4 cups (9 7/8 ounces, 280 grams) sugar
3/4 cup plus 2 tablespoons (2 7/8 ounces, 82 grams) unsweetened cocoa powder
1/4 teaspoon salt (or a heaping 1/4 teaspoon flaky salt)
1/2 teaspoon pure vanilla extract
2 large eggs, cold
1/2 cup (66 grams, 2 3/8 ounces) all-purpose flour
2/3 cup walnut or pecan pieces (optional)

Preheat the oven to 325°F. Line the bottom and sides of an 8×8-inch square baking pan with parchment paper or foil, leaving an overhang on two opposite sides.
Combine the butter, sugar, cocoa, and salt in a medium heatproof bowl and set the bowl in a wide skillet of barely simmering water. Stir occasionally until the butter is melted and the mixture is smooth. If you prefer, you can also just melt the butter and mix it all up - I've done it both ways and the only difference I notice is the texture of the sugar. It will probably look like dark, wet sand, but that's fine.
Stir in the vanilla. Add the eggs one at a time, stirring vigorously after each one. When the batter looks thick, shiny, and well blended, add the flour and stir until you cannot see it any longer, then beat vigorously for 40 strokes OR with a paddle attachment in a mixer (for the quadruple batch this was necessary!!) Stir in the nuts, if using. Spread evenly in the lined pan - this is THICK, so you will need to spread it.
Bake until a toothpick in the center emerges slightly moist with batter, about 30-40 minutes. Let cool completely on a rack if you are patient. You can put it in the fridge or freezer to get a cleaner cut, or cut with plastic while hot. [I actually use the back side of the spatula that came with my food processor.)
Lift up the ends of the parchment or foil liner, and transfer the brownies to a cutting board. Cut into 16 or 25 squares.

Saturday, February 13, 2010

Saturday Splurge: Brown Sugar Meringue Tart

The book called this one "Caramel Meringue Tart" but it really doesn't taste that much like caramel to me. Absolutely amazingly delicious, yes, but not caramel. It reminded me a little of the brown sugar pie my mom used to make. You know, one of those things that is so rich that you can only eat a 16th of the pie at most (but I could eat a whole regular piece anyway.) This is a French recipe, and supposed to be in a tart pan, which means that it's much more shallow than an American pie. Which means that it's a more reasonable amount of delicious richness than a brown sugar pie. The fluffy cloud of meringue that sits on top also helps balance the filling.

I made this in my building, which is very much tart pan and pie pan-less. Instead, I took two large pieces of the industrial aluminum foil, measured 8.5 inches across the bottom (it asked for a 22cm tart pan) and turned up the edges. Worked pretty well! Of course everyone loved it and it was amazing and delicious. I had to whip the egg whites by hand, so the meringue isn't as shiny as it would have been with a mixer. It was good enough for me, though! You can start making the filling after the shell goes into the oven, and then the meringue shortly before the crust comes out (you don't want the meringue to sit or it will be harder to spread.) And so, without further ado, I present you...

Brown Sugar Meringue Tart
Serves: 10 Prep time: 2 hours ish (that includes chilling time)

For the crust:
2 cups flour
9 Tbs unsalted butter, chilled and cut into cubes
2 Tbs white sugar
1 egg yolk (reserve the white for meringue)
1 Tbs ice water

For the filling:
1 cup plus 1 Tbs brown sugar
1/3 cup flour
8.5 oz milk (1 cup plus 1 Tbs)
3 Tbs unsalted butter
1 tsp vanilla extract
1 egg yolk (reserve the white for meringue)

For the meringue:
2 egg whites
2 Tbs white sugar

To make the crust:
- Sift flour and then work in butter with fingers
- Add the egg yolk and water, knead in until a soft dough forms
- Roll into a ball, cover in plastic wrap and refrigerate 20 minutes
- When chilled, roll out between two pieces of plastic wrap into a circle about 12 inches in diameter
- Place in pie pan (or tart pan, if you have one!) and cut off any excess
- Prick in several places with a fork, cover in plastic wrap, and chill 20 minutes again. At this point, you should also start preheating the oven to 375.
- Line pie crust with tinfoil or parchment paper and fill with pie weights, rice, or dry beans.
- Bake 35 minutes, then remove from oven, remove weights and liner
- Leave on counter until filling is ready

For the filling:
- Put flour and brown sugar in a small sauce pan, making a well in the middle
- Add the milk a little at a time, stirring with a whisk until the mixture is smooth.
- Over medium low heat, add butter, stirring constantly for 8-10 minutes, or just until the mixture comes to a boil and thickens some
- Put egg yolk in a small bowl. Add about a cup of the hot mixture to the egg yolk, stirring constantly, then pour egg mixture into saucepan, stirring constantly.
- Remove from heat, add vanilla extract and mix until smooth (may not take long at all)
- Pour into baked shell and smooth out the surface.

For the meringue:
- Whip the egg whites until stiff peaks form, adding the sugar a little at a time. The yolks should be shiny when finished
- Spread the meringue over the filling
- Bake 5-10 minutes or just until the meringue is golden brown on top
- Serve warm or cold

Saturday, February 6, 2010

Saturday Splurge: Gingerbread

I'm not talking about cookies, here. I don't like gingerbread cookies. There is just something seriously wrong with them. Of course, I have nothing against ginger. Ginger ale. Ginger tea. Ginger in chutney or peanut sauce is a must. But those cookies... yuck. Ginger snaps, too. Sometimes I started disliking stuff when I was little (like mushrooms) and then I've tried it again later and loved it (like mushrooms.) I tried ginger snaps again this week. I'm sorry, no. I even tried chocolate-covered crystalized ginger because it sounded cool. It was too strong for me, but way better than those crap cookie things.

However, I tried a friend's gingerbread once, and it was good. So I decided a couple of weeks ago that I need to make some of my own. After a bit of searching on my favorite recipe bloggers, I found it. Smitten kitchen finds them for me again! One of the things that told me I had to try it is that she said she didn't know she liked gingerbread before this one. And it has Guinness in it. Ok, it can use any stout. Next time I'll go for Young's Double Chocolate stout. (mmmmm) It gets brought to a boil for a few minutes, so I'm fairly certain any actual alcohol content evaporates, making it 100% safe to serve to all ages. For those of you non-alcoholers, others suggested coke. Please try it (please, seriously!!) and tell me how it turns out.

This is a splurge more for the time than the nutrition - it has a relatively low amount of oil, but the sugar likely makes up for it. And don't think you can only make this at Christmas, as everyone here loved it. I think we went through about 40 pieces in 30 minutes. I reserved 3 pieces just to get to try it the next day (when I had the time to snap a pic, too), since she said it ages well. Mmm. The pic is mine, but I am cutting and pasting the recipe exactly because it was perfect.


Grammercy Tavern's Gingerbread
Serves: about 20 if the pieces are real-sized Time: about 30 minutes, plus 50 minutes to bake and 10 minutes to cool

1 cup oatmeal stout or Guinness Stout
1 cup dark molasses (not blackstrap)
1/2 teaspoon baking soda
2 cups all-purpose flour
1 1/2 teaspoons baking powder
2 tablespoons ground ginger
1 teaspoon ground cinnamon
1/4 teaspoon ground cloves
1/4 teaspoon freshly grated nutmeg
Pinch of ground cardamom
3 large eggs
1 cup packed dark brown sugar
1 cup granulated sugar
3/4 cup vegetable oil
Confectioners sugar for dusting

Accompaniment: Unsweetened whipped cream

Preheat oven to 350°F. Generously butter bundt pan and dust with flour, knocking out excess. (She is not kidding about this. I used a nonstick pan with a butter/flour spray and still lost a chunk of cake. I will be more generous next time.) [Beki's note - that's from SK, I heavily buttered & floured a super long loaf pan and only lost a little in the center, but it could have been due to my impatience with the cooling.]

Bring stout and molasses to a boil in a large saucepan and remove from heat. Whisk in baking soda, then cool to room temperature.

Sift together flour, baking powder, and spices in a large bowl. Whisk together eggs and sugars. Whisk in oil, then molasses mixture. Add to flour mixture and whisk until just combined.

Pour batter into bundt pan and rap pan sharply on counter to eliminate air bubbles. Bake in middle of oven until a tester comes out with just a few moist crumbs adhering, about 50 minutes. Cool cake in pan on a rack 5 minutes. Turn out onto rack and cool completely.

Serve cake, dusted with confectioners sugar, with whipped cream.

Do ahead: This gingerbread is better if made a day ahead. It will keep 3 days, covered, at room temperature. I am sure it will keep well-wrapped in the freezer even longer.

Saturday, January 30, 2010

Saturday Splurge: Halwa Truffles

These were... amazing. Yes, I mean it. They fall into the "left-overs" category for me b/c there was a one-pound thing of halwa with just about a cup left, although I realize that some people may have trouble even finding halwa. First, what is it? It's a Mediterranean sweet (I used the Arab version) that's made from a base of sesame tahini. Wikipedia's take on it is here. It's something I was introduced to in Tunisia, and it's very sweet, but very good. If you like that kind of thing. If there is a Turkish/Middle Eastern/Arab grocery near you, I bet you could find it there.

While looking for North African dessert recipes, I stumbled across this recipe, posted by an Algerian woman now living in Malaysia(?) and knew I had to try it. That's her picture of them above. She calls it a truffle, and I like that so I'll stick with it, though it is a bit unusual. Instead of being chocolate coated with chocolate, it's a bunch of other tasty things coated with chocolate. She used orange flower water in the original, but I didn't feel like searching for it, so I used just plain water. She says you can replace the honey with jam if you want, which could add some interesting flavors as well. She used butter cookies but, not being able to find a good option, I went with graham crackers and upped the butter a little. It worked well. She also used almonds, and I went with that, but there is a store near me that also sells pecan and hazelnut meal, so I may have to try those sometime, too...

Halwa truffles
Makes: About 30 truffles Time: about 40 minutes, plus chill time.

1 cup of almond meal (or almonds -blanched or not- processed to a sand-like powder)
1 cup of coconut, processed into little bits (unsweetened would be good here, some stores sell it as "macaroon" coconut and it's already in small bits)
1 cup of halwa
3 graham crackers, crushed (doesn't have to be as fine as for a crust, but can be)
1/4 cup butter
3 Tablespoons honey (or jam)
water, to make dough stick
About 8 oz of good chocolate, to coat

- In a large bowl, blend the almond meal, coconut, halwa and graham cracker crumbs with a pastry blender until mixture resembles coarse sand. (Or mix them all in a large processor.)
- Add the melted butter and honey, mix thoroughly. Taste at this stage - if you think it's too sweet, add more graham cracker crumbs.
- Add water, one tablespoon at a time, just until you get a dough that will hold together in a ball. The texture will change quickly, so really do it just a bit at a time.
- Form into bite-sized balls. Freeze for about 20 minutes to solidify balls.
- Before removing from freezer, melt chocolate in the top of a double boiler. When melted, remove balls from freezer, coat, and place on wax paper to cool.
- Can be served more or less immediately, or kept in an air-tight container for up to two weeks, layers separated by wax paper.

Saturday, January 23, 2010

Saturday Splurge: Easy Molten Lava Cakes

Well, I have decide that as part of posting more, I'll allow myself one really non-healthy recipe per week. Because we all want something just amazing and non-healthy now and then, and in small quantities, why not? I won't put the nutrition info for you in the spirit of needing to give in now and then.

Some of you may not believe me for the "easy" on this recipe, but I swear it is. One of my kitchen helpers saw me make it and was just stunned at how fast it went together. In France, I got a recipe book called "Moelleux et coeurs coulants" - which means little super moist cakes and cakes with a runny center. Like many French desserts, these are made serving-size, so it's easy to portion them. I had half of one and was content. (And if anyone tells you I ate part of the batter while waiting for them to cook, they're lying!) I tried one recipe on Tuesday, but it was not very impressive. My friends still ate it, and thought it tasted good, but it just wasn't what I was hoping for. So I insisted on trying again on Thursday (with a different recipe from the same book) and had real success! The result, instead of being called "good" was instead named a "mouthgasm." That's as much of a compliment as I need.

This recipe is really two things: milk chocolate ganache and the dark chocolate individual cake. Yes, I repeat, both are easy. I'll list the ganache recipe second because it is way more than you need for the four cakes the cake recipe makes. If you want to go an easier route, buy some truffles that are rolled in cocoa (not with a hard shell) and drop those in the middle instead. It does take a little bit of thinking ahead, but this is something decadent enough that you'll want to plan a reason for it anyway. I may play around with this more to see if I can decrease the butter a little because it left a greasy spot on the plate and that's not attractive. But the taste is worth it, even as-is.


Easy Dark Chocolate Molten Lava Cakes
Serves: 4 Time to make: less than 30 minutes, plus chill time for the ganache

To make the cakes:
5 ounces semi-sweet chocolate (I used 5 squares of Baker's semi-sweet)
7 Tablespoons butter
3 Tablespoons heavy cream
1 Tablespoon flour
1 Tablespoon cornstarch
1/4 cup brown sugar
2 eggs

- Preheat oven to 400 (Yes, really preheat it, this is important!)
- Butter and flour (or sugar, I think it's prettier) 4 ramekins (mine are 3 3/4 inch, or 7cm)
- In a medium bowl, beat the heck out of the eggs and sugar. Sift the flour and cornstarch over the egg mixture and beat until fully blended.
- Melt the chocolate with the butter and cream in a double-boiler, stir til all smooth.
- Add the chocolate mixture to the egg mixture and stir until the batter is smooth
- Fill the ramekins 2/3 of the way, add a tablespoon of ganache, and fill the ramekins the rest of the way.
- Bake for 6-7 minutes, until they look done on top. They will be VERY soft. Run a butter knife around the edge of the ramekin to be sure it won't stick, flip over, and serve immediately.

To make the Milk chocolate ganache:
2 1/2 oz GOOD milk chocolate or GOOD milk chocolate chips (for a 12 oz bag, this is just over a quarter of the bag. For Guittard milk chocolate chips, it was 1/2 cup, but they are pretty large.)
2 Tablespoons heavy cream
2 teaspoons butter

- Put the cream in a microwaveable bowl. Microwave on high for 20 seconds.
- When the cream dings, immediately add chocolate and butter. Stir until both melt and the mixture is completely smooth.
- Cover and chill (in fridge) at least 2 hours, or until you are ready to make the cakes.

Since this is a microwave recipe, you may need to adjust the time. If you mix in the chips and butter and after a minute or two they won't melt any further, microwave for 5 seconds and stir again, continuing (just 5 seconds each time, you don't want to burn it!) until the chocolate and butter are fully incorporated.