Thursday, August 23, 2012

Whole wheat, low sugar apple pie scones

Last night I really wanted something kind of muffin-y, but not. I had re-found my apple pie scone recipe last week, and thought that sounded perfect. Of course, this time I decided it should be with white whole wheat flour. So, I set about making them and decided they should have half of the sugar, too. They don't start out with much sugar, just 1/4 cup, so I also added a little bit of stevia.

Side note on stevia, my grandma has been using since I was in about 5th grade, I think. She had to get it from a specific store and it was only in liquid form. I think the current popularity is pretty funny, as if it had just been found. That's part of the reason that I'll use it when I don't touch the other 'sugar substitutes.'

Back to the scones. I mixed the dry ingredients, then the wet (used greek yogurt this time) and put it all together. It was too dry, so I added 2 Tbs water. I went to plop it out on the cutting board to shape it and... saw the apple I had chopped. How did I miss that?? So, I mixed in the apple. Then I glanced at the computer screen. And saw a mention of butter in the directions. And hadn't added any. So THAT is where the dryness came from. Oops. I added a tablespoon of oil, since it was still a bit dry, and finally shaped and baked them. Which means that these turned out lower in fat than I had planned!

Between the whole wheat and reduced sugar, these aren't particularly sweet. Mr. More Calories's first response was "needs more honey" and proceeded to eat his with honey. I enjoyed them plain or with almond butter. The greek yogurt ups the protein, too, so these are a pretty darn good snack!


Whole wheat apple pie scones
Makes 16 mini scones, 20 min prep, 10 minute cook

2 1/2 c flour (I used white whole wheat, also reflected in nutrition info)
1/4 c granulated sugar
2 teaspoon baking powder
1/2 teaspoon baking soda
1/2 teaspoon salt
1/2 tsp cinnamon
1/4 tsp nutmeg
1/4 cup chilled butter, cut into pieces
1 medium green apple, diced (about 1 1/2 cups, depending on the size)
3/4 cup low-fat plain yogurt (I used Fage 2%, or one six oz. container)
1 large egg, separated
1 tsp vanilla

1 - Preheat oven to 425ºF
2 - Combine flours, sugar, baking powder, baking soda, salt and spices in a large bowl
3 - In a small bowl, combine yogurt, egg white, oil and vanilla
4 - Stir fruit into the dry ingredients
5 - Add yogurt mixture to dry ingredients stirring just until moist (may be sticky)
6 - Divide into two parts and pat into rounds about 6-8 inches across. Cut into 8 equal parts.
7 - (Optional) Beat egg yolk and brush over tops of scones to smooth them out and make them look pretty.
8 - Bake at 425ºF for 7-10 minutes or until golden (mine took about 10 minutes in my current oven)

Nutrition per 1 scone: Fat - 1.8g; Cal - 96; Protein - 4g; Carbs - 17.2g

Tuesday, July 17, 2012

Review: High Protein Sweet Potato Spice Cookies

Two days ago I pinned a very fun looking recipe. High Protein Sweet Potato Spice Cookies. How cool is that?? And no sugar! Even more exciting! I got the sweet potatoes from the store that night, but made the brownie batter dip instead. Can you blame me? I can't.

Tonight it was the cookies's turn. I mixed it up. And almost over-did it on my poor blender. It's 600 watt, but I could smell its effort. I put them on a cookie sheet. And baked and waited. And checked. And waited longer. And then some more. I think they spent a total of an HOUR in the oven. Hers were somehow 15-20 minutes. I have no idea how...

They look good enough, anyway
When they finally came out I tried one. Ok, I tried 2 before that along the way to test them as well. It was... different. She said she liked them cold, so I chilled 2 in the freezer and then offered one to Mr. More Calories, who had recently arrived and appreciated the smell of cinnamon and ginger. He bit it. Chewed. Made a face. Kept chewing. Then made 'eeeeuuurggghh' noises like a small child and ran to the trash to spit it out. He said you can't call that a cookie.

To be fair, it's from a blogger that doesn't eat sugar or even a lot of fruit due to allergy reasons. I know people figure out how to live with whatever they have to, but for someone used to sugar these are a big surprise. I didn't hate them, but I will let you go to her site if you'd like the recipe. She said 'one medium sweet potato' whatever the heck that means, and mine was 1.5 cups, mashed, if you're curious. They're pretty decent topped with brownie batter dip or banana! So I will eat them. I just won't have anyone fighting me for the last ones.

My overall opinion
: I won't throw them out, or 'gift' them to others, but they aren't on the top of the list to try again. If you do try them, consider them a small vehicle for other delicious things, not a cookie!

Recipe facts you might want:
Makes 36 Tablespoon-sized cookies.
Prep time: 20 minutes WITHOUT cooking the sweet potato, 50-60 minutes to bake
Nutrition info for 1/12th of recipe as written: Cal: 150   Fat: 4.5g   Carbs: 22g    Protein: 6.5g

Sunday, July 15, 2012

Brownie Batter Dip

I have one thing to say: SOOOOOOOO GOOOOOOOOOOOOOOOD!

Sorry, now that that's out of my system. I've been trying to eat more protein, because when I moved out from being made food, I realized that I don't reach for protein sources automatically. Cookies? Yes. Protein? No. So I figured if I could find some SWEET recipes with protein, easy fix! Oatmeal has a decent dose, then add some nuts & you're good. That's still just one option, though.

Enter Chocolate Covered Katie. She has some amazing ideas I've drooled over before. But she had one that sent me to the cabinet to make. ASAP. Brownie Batter Dip. Yes, amazing deliciousness in dip form that is also full of protein. I kid you not. I am putting the way that I made it, because it was different from hers, but please do see the original at the link above! She has lots of different options.

I actually divided my batch so I could try it with two sweeteners - one with honey and the other with brown sugar. Mr. More Calories says the sugar one would be really good for frosting, but likes the honey one better (as do I.) I realize it's not the most absolutely healthy thing in the world, and I'm excited to try it with dates, but it's super amazing how delicious it turns out!


Brownie Batter Dip
Adapted from Chocolate Covered Katie
Prep time about 10 minutes my way, probably 5 hers
6-8 servings (after making it twice, this seems right.)

1 can garbanzo beans (250g), drained and well rinsed
3-4 Tbs cocoa powder, to taste
2 Tbs milk
3 Tbs almond butter
2 1/2 tsp vanilla extract
1/8 tsp salt
1/3 - 1/2 c honey, to taste (I used 1/2, but will do less next time!)
1/4 - 1/2 c oatmeal (I did it by handfuls, sorry)

I am food processor-less, so I mashed it all first with a potato masher and then put it in a blender and pulsed until it was mostly smooth, and then turned it to high. (She uses a food processor.)

Nutrition info (1/8th of recipe, 3T cocoa, 1/2c honey, 1/4c oats): 257 calories, 6.2g fat, 45 carbs, 9g protein
Nutrition info (1/8th of recipe, 3T cocoa, 1/3c honey, 1/2c oats): 245 calories, 6.4g fat, 40 carbs, 9g protein

Thursday, July 5, 2012

Green smoothies!

I started making smoothies using a commercial-quality blender, so I took much too long to pick a blender now that I won't have access to that one. Everybody has critiques on the working of all blenders that cost under $100, and maybe it is smarter to get one of those, but I still can't bring myself to do it. I ended up with a crazy, almost painfully, loud one that arrived yesterday and I waited til today to open and try it out.

On the way home, I stopped for spinach, ginger and a green apple. I already had vanilla soy milk in the fridge. The most time I took for this one was peeling the ginger and chopping the apple - the blender recommends that pieces be less than 1-inch across. *sigh* shouldn't a blender be able to handle more? Maybe next time. If you do this, be sure to use a green apple, or if not add in a bit of lemon or lime juice, because the tartness helps brighten up the whole thing. You don't want to just taste a spinachy drink, right? Right.


My Typical Green Smoothie
Time: 15 minutes

1/2 cup vanilla soy milk (plain or any other milk would be fine)
1-inch cube of ginger (think half of your thumb)
3 cups spinach
1 green apple (Or red apple with 3 tablespoons lemon or lime juice)

Pour soy milk in blender jug.
Peel ginger and add to blender.
Cut spinach if your blender thinks that will help it. Add to blender.
Cut apple into whatever size your blender can handle. Add to the rest.

Blend it up! I pulsed it until it started going, and did need to push it down. Usually I push it with celery, but forgot to get some at the store. It adds a fresh taste and gives you a safe pushing-stick that you can use while the blender is going!

Tuesday, July 3, 2012

Brisket-y pot roast

I realized that I don't post much, but most of the things that I make are from other food bloggers. So I decided that the right thing to do is to let you know how these are from my point of view! I completely respect the bloggers whose recipes I use, but sometimes we have different goals. And sometimes I change things just because I don't want to go to the store. So I'm calling these 'reviews' even though it's sometime a rather different version of what they made!

The first review here is of Deb's Tangy Spiced Brisket (smittenkitchen). I was actually looking for her brisket recipe that I used at Taos, but found this one and went for it instead, haha. She didn't use potatoes or carrots, but I wanted a one-dish meal, so I did. I also had a much smaller brisket, so I'm including the ingredients I used below. I actually had a 1-pound brisket, because Mr. More Calories was worried about it not all getting eaten, but I'd recommend a 2-3 pound one. We both agree that the 'sauce' that comes out of this is fantastic!

Overall Conclusion: I will use the sauce of this with regular beef pot roast, skip over carmelizing the onions and just use big onion chunks, and then also add all of the spices directly to the pot. Will make it quicker and I think still very tasty! Also plan to add tomato chunks.


Tangy Spiced Brisket with Potatoes and Carrots
Prep Time: 30 minutes
Cook time: 6 hours
Adapted from Smitten Kitchen

1 onion, sliced
2 tablespoons vegetable oil
2 garlic cloves, peeled and halved
1/4 teaspoon paprika
1/2 teaspoons salt
1/2 teaspoons garlic powder
1/4 teaspoons black pepper
1/2 teaspoons onion powder
1/8 teaspoon cayenne (adjust to your preference - I added too much while it was on the stove top and we had to turn on the allergy air filter. oops.)
1/4 teaspoon dried oregano
1/4 teaspoon dried thyme
2-3 cups beef stock (I used low sodium - use enough so that it almost covers the beef)
3 oz tomato paste (she said ketchup, but I would rather use the plainer option)
1/2 cup chili sauce* ( I used Heinz, which she recommended - not hot at all)
1/3 cup brown sugar (light or dark)
2-3 pound brisket

5 medium red potatoes
1 pound carrots

**See her original post for more detailed directions or for just a pot roast!**
1 - Slice the onion and carmelize it. Then add garlic and spices - stir and cook for 2 more minutes.
2 - Put Sauce ingredients (beef stock through brown sugar) in the pot of the crock pot.
3 - Cut potatoes and carrots into big chunks. Put potato in pot. Put brisket on top of potatoes, then surround with carrots and top with onion spice mixture.
4 - Cook on low for 6-8 hours. (I did overnight and then had it for lunch the next day.)
5 - Enjoy!

Sunday, June 10, 2012

Mozzerella Cheese Sticks

I LOVE Pinterest. I could lose whole afternoons on it. Food, clothes, crafts, party ideas, you're wandering around and it's all there with enticing pictures to boot.

I have a whole board full of food ideas. Very few are quick or healthy but this recipe that I found and the girls begged me to make fits the categories.

The idea came from this pin originally.

Here is the recipe in it's original location.

And here is the recipe for anyone who doesn't want to have to open 25 tabs.

- String cheese. Any flavor or brand will do. After doing a bit of research it was mentioned that fat free
   doesn't melt as fast. The original recipe called for 12 sticks we did 8.
- 1 egg
- flour
- 5 T of bread crumbs. I put 3 slices of bread in the food processor with a sprinkle of Italian seasoning and
   a tarragon rub and it was more than enough to do 8 full cheese sticks. I let the bread crumbs dry out over
   4 hours
- 2 T Parmesan cheese
- olive oil or cooking spray. The original recipe had you use this to coat your foil on the pan to
   avoid sticking. I used parchment paper and had no problems.

Cut your cheese sticks to size BEFORE you freeze them. Frozen cheese sticks are a lot harder to cut than you'd think. We cut our cheese sticks into thirds but next time I think I will go smaller to make them last 3 seconds longer, maybe.

Once the cheese sticks are frozen put an egg in a bowl and beat it well. 

In another bowl combine the bread crumbs and Parmesan cheese.

To coat the cheese sticks roll them in the flour (we put flour in a gallon baggie tossed in all the cheese and shook it up really well) dip them in the egg and then roll them in the bread crumb mix. 

Place the cheese sticks on your lined and greased, if necessary, baking sheet. 

Bake at 400* for 4 minutes or until crisp. Watch them closely so they don't become cheese puddles. Ours took 6 minutes and I think I could have left them in one more minute to get a little bit more crispy. 

Here are my lovely photos.
 
The girls loved them, George only had a few but she is so picky I'm amazed she tried them at all. ElCid though they were great, fried cheese is his favorite restaurant appetizer and would like more next time, he only got one!

Wednesday, May 30, 2012

Almond Cookie Oatmeal (with Dates)

It's kind of funny, I had never actually had a date until I went to Tunisia. I mean, I had eaten the nasty flour-coated mouse turds in cereal that they claim are dates. (Sorry if I just stopped you from ever touching those again. Sort of.) But Tunisia exports a lot of dates, and people eat them often, and I'm willing to try anything. And whoa. My first thought is that they are like natural pastries. Especially when fresher, and not chilled, they have a texture and flavor that reminds me so much of baked sugary or honey-covered wonderfulness.

Apparently I'm not the only one to think so because the cookie flavors of Lara bars all have dates as the first ingredient. I usually get deglet dates since they're cheaper, but be sure they're not all dried by the time you get them. Medjool are the fancier, pricier kind. And usually more moist.


So today I have more oatmeal for you. Sorry if that's boring, but with the stove still sitting in my office, there's not much choice! I did make two more crockpot experiments, one of which may get posted here, but neither was fantastic. Yet. They could be improved. But this oatmeal is completely sugar-free and extra sweetener free! Ahhh, the magic of dates!

Almond Cookie Oatmeal
Serves: 1
Prep time: 3 minutes

Ingredients:
1/2 cup old-fashioned oats (they are less processed than quick oats, but you could really use either.)
1/4 cup almonds
1/4 cup dates (the 5 pictured above happened to make 1/4 cup)
1/4 teaspoon cinnamon

1. Put oatmeal in a 2-cup microwaveable container. Add water to barely cover oats for thick oatmeal, or to cover by a lot for thinner.

2. Cook in microwave on high for 90 seconds.

3. Chop dates. I did this while the oatmeal was cooking.


4. When the oatmeal is done, add almonds, dates and cinnamon. Stir and enjoy immediately or move to a prettier serving dish :)

How I normally eat my oatmeal - fewer dishes!

Thursday, May 24, 2012

Fresh Chicken Stock (slow cooker)

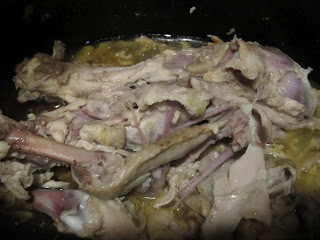
When I made the successful chicken in the crock-pot the other day, I had seen someone recommend throwing the bones, etc. back into the pot to make fresh broth or stock or whatever you like to call it. I figured this was a cool chance and not to be missed. So, after I ate dinner, I pulled all of the meat off of the chicken carcass (as some call it) and put all of the bones, skin, etc back in the pot. Well, not quite true, I was looking at the bones and said aloud "whoa, look at its spine, that's cool." Mr. More Calories glanced at it and said "that's gross," in a very matter-of-fact kind of way. I still think it was cool, but decided not to take a picture. The recipe follows for you. This can be used in anything that calls for chicken broth or stock or bouillon or whatever you prefer to call it.

I am missing a lot of kitchen tools right now because I lived in a place that had everything for 3 years and am now in the process of getting my own. Fun, but slow so far. I used a colander instead of a proper mesh strainer, so my broth remains pretty... colorful. That's ok with me, but I'm getting a strainer next because it's not always good.

One word of caution, though - that stuff is HOT when it's done! I know that's obvious, but crock pots are not meant for pouring. That means when you go to strain out the bits, be careful. I had to re-wash my counter. And a patch of floor. And 'got' to feel how hot it really gets. Just be careful.


Fresh Chicken Stock in the slow cooker
Prep time: 10 minutes
Cook time: 8-24 hours
Makes: about 5 cups

Ingredients:
Inedible bits from 1 chicken
3 cups water

1. Make sure your chicken meat is all pulled off of the bone. You don't want to lose any of the stuff you can eat as-is!
No water added, just the chicken's own juices from cooking.

2. Put all bones, skin, etc. in the insert (the 'pot' part). Add 3 cups water.


3. Turn on crockpot to low (or simmer, depending on your cooker) for 8-24 hours depending on your patience and time available.

Pot after 24 hours
4. When it's done cooking, strain in a fine strainer, lined with cheesecloth if you really want all of the little stuff out.

Mine has a ton of floaty stuff because I don't have a strainer right now.

5. Put stock in a covered container in the fridge. The next day, skim off all of the fat that will rise to the top.

6. Use in your favorite recipe!

I actually don't have a strainer yet. And my cheesecloth is trapped in a cabinet in the construction zone. So I used a colander and will need to re-strain it to use it. I think I might make rice. Or Potatoes. Oooh, or soup. Yes, soup, that's it.

This is what was left over after the stock was strained off.

Tuesday, May 22, 2012

Crockpot Chicken

I don't eat very much meat because I care too much about where it comes from. No matter what kind of chicken you're buying, a whole chicken costs about half as much per pound as the boneless, skinless breasts that have become standard fare for most of us. But whole chickens scare me. Or used to. I decided to take the plunge and just try a whole chicken with my new friend (a 3.5 quart programmable crockpot.) 

It was actually really easy! The hardest part was checking to make sure if there was a plastic bag of nasty bits inside (mine didn't have any.) From start to finish, including taking the ingredients out of the fridge and peeling my sweet potatoes with a paring knife it took me 23 minutes (must buy vegetable peeler!)

One of the cool things about this to me is that it was amazingly easy and will feed us (me & Mr. More Calories) for a few meals. More on that to come!

Crockpot Whole Chicken
Serves: 6 (chicken) or 2 (with sweet potatoes for dinner)
20 minute prep, 7 hours to cook

Ingredients:
1 whole chicken (mine was 3.5 lbs)
2 small sweet potatoes (about 1 pound)
1 medium onion (about 1 cup)
2 teaspoons poultry seasoning or rub (really, anything you like!)

1. Peel the sweet potatoes. Chop about 1/2-inch thick. Put in the bottom of the slow cooker.
2. Peel the onion and cut into thick wedges. Place on top of the sweet potato.


3. Take the chicken out of its plastic, make sure there aren't any surprises in the cavity (and if there are, ask someone else what to do with them!) I didn't even take off the skin. I'm not going to eat it, but it was easy and it will make a tasty stock. Rub with the poultry rub or seasoning and stick on top of the potatoes and onion.


4. Turn on the pot to low (recommended by my cooker for meats for long times, check your instruction manual to be sure!) and cook for 7 hours. This is what it will look like when it's done:


You see the liquid down there on the right? It's all from the chicken and vegetables, there was no liquid added. Big difference between cooked and uncooked, right? Ok, no, well here it is on a plate with some salad for my dinner. I went back for more sweet potatoes. And I know the onions aren't prettiest. At least they tasted good.


Thursday, May 17, 2012

Apricot Almond Butter Oatmeal

I have been mostly gone for the last two years because I am a grad student (although I have been since I started this blog) and moved into a house of 100 students. I say house because we are all responsible for making sure the house runs smoothly - cooking, cleaning, discipline, all of it! For the first year, I was just any other student there, but for my second and third year, I was in charge of lunches and dinners. No, I didn't make them all. In fact, I helped actually make very few. I did find the recipes, translate them into 'new cook' and scale them to the proper size to feed hungry college students. After the dinners, I would sometimes need to check in with the cooks and make my version of 'new cook' match the reality.

One of the biggest things I learned was how intimidating cooking can be for some people. Some of my earliest memories are pulling out drawers in the kitchen to make stairs for me to climb up and stir a pot when my mom was on the phone (and I just realized how absolutely crazy that sounds on so many levels!) There's also a great story of helping with banana bread... but maybe another day. The thing is, I didn't realize how foreign a kitchen could be to others, that to some the freezer is a logical place to look for olives, that 'lentils' and 'split peas' are completely unknown, or that some don't see the point in measuring -- ever.

With this new information in hand, I return to my blog. I am moving out of my giant house this summer and hope to find time to continue here in the fall once teaching, learning, and research begin again in a structured way.

On to the oatmeal! I looove oatmeal. I used to it eat twice a day according to my little sister. She's probably not the best authority, and definitely at ramen twice a day for years. It's super quick, it's tasty (when done right!) and is also nutritional and filling with the right extras added in. I found out when a house mate had some extra almond butter, and my peanut butter ran out, that it is absolutely delicious in oatmeal! Like it was meant to be. So here it is for you.


Apricot Almond Butter Oatmeal
1 serving, 3 minute prep time


1/2 cup old-fashioned oats*
water
5 dried apricots
1 tablespoon almond butter
1 teaspoon honey (optional)
* - for me, this is about two handfuls. It's easier than trying to measure it :)

Start out by putting the oats into a microwave-safe bowl that holds at least 2 cups (big to avoid spilling over and making a mess in the microwave. 3 or 4 cup is fine, I make mine in the pyrex measuring cup.)

Add water. I add to just above the oats. This makes thick oatmeal. More water means thinner oatmeal.

Microwave on high for 90 seconds.

While it's microwaving, chop up the apricots. (I just tore them up by hand, but ended up wishing the pieces were smaller.)


When done, add apricots, almond butter and honey to the dish. Stir. Enjoy!

Nutritional information (with honey): 357 calories, 13g fat, 55.5g carbs, 10g protein
Nutritional information (no honey): 335 calories, 13g fat, 50g carbs, 10g protein